Grunt 安装
本章提供了如何在您的系统上安装 Grunt 的分步过程。
Grunt 的系统要求
操作系统-跨平台
浏览器支持-IE (Internet Explorer 8+)、Firefox、Google Chrome、Safari、Opera
安装 Grunt
步骤 1-我们需要 NodeJs 来运行 Grunt。要下载 NodeJs,请打开链接 https://nodejs.org/en/,您将看到如下所示的屏幕-
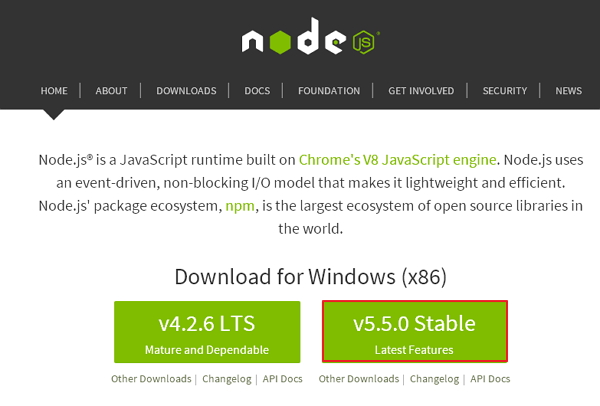
下载 zip 文件的
最新功能版本。
步骤 2-接下来,运行安装程序以在您的计算机上安装
NodeJs。
第 3 步-接下来,您需要设置
环境变量。
路径用户变量
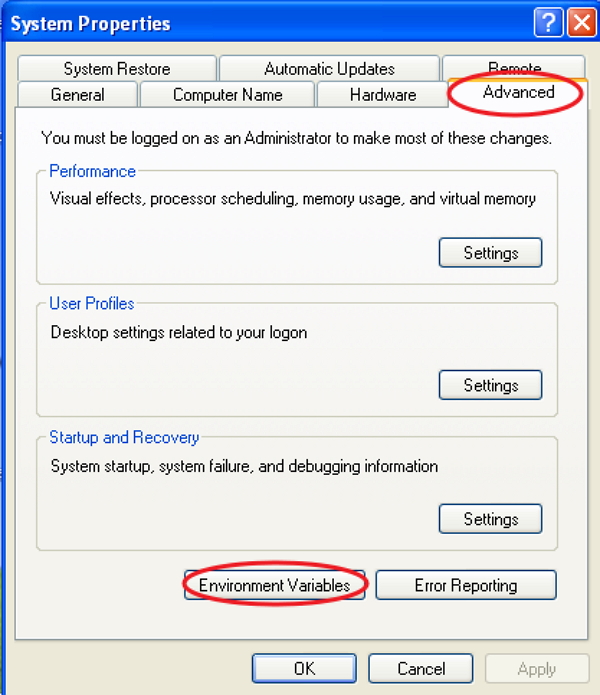
右键单击我的电脑。
选择属性。
接下来,选择高级标签并点击环境变量。
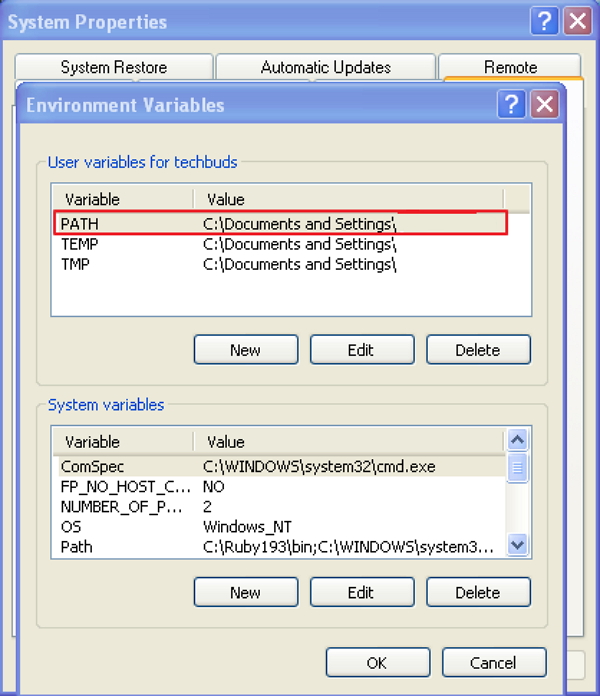
 在 Environment Variables 窗口下,双击 PATH,如屏幕所示。
 您将看到一个编辑用户变量窗口,如图所示。在 Variable Value 字段中添加 NodeJs 文件夹路径为 C:\Program Files\nodejs\node_modules\npm。如果已经为其他文件设置了路径,那么您需要在其后放置一个分号(;)并添加如下所示的 NodeJs 路径-

最后,点击
确定按钮。
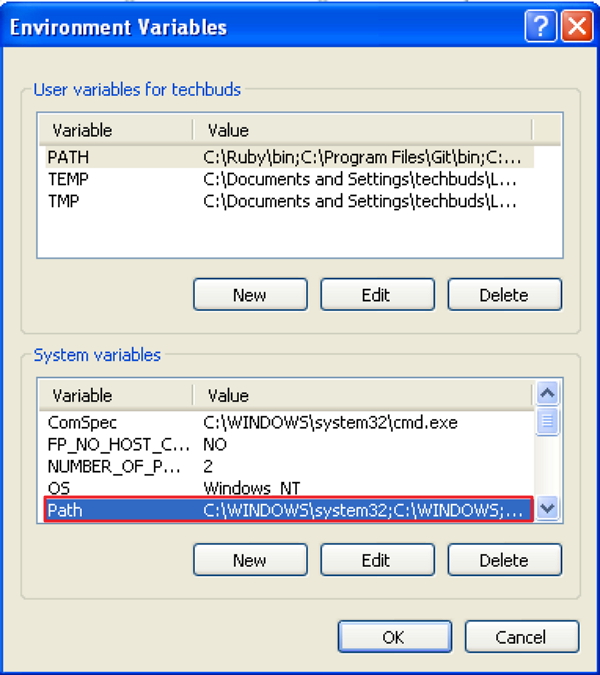
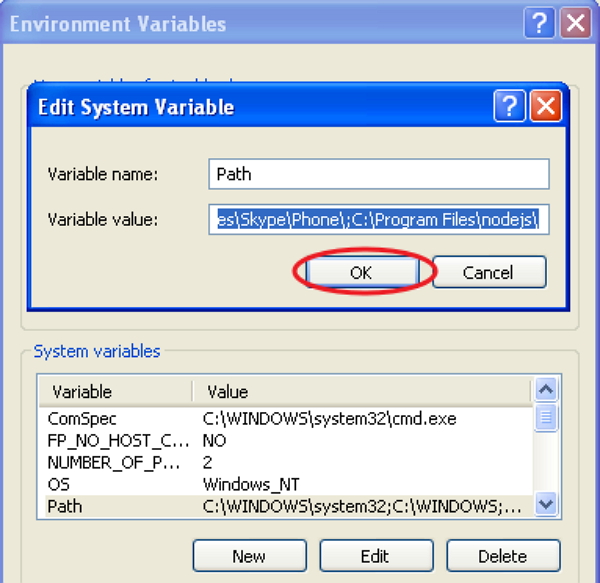
系统变量
在系统变量下,双击路径,如下图所示。
 您将看到一个编辑系统变量窗口,如图所示。在 Variable Value 字段中添加 NodeJs 文件夹路径为 C:\Program Files\nodejs\ 并单击 OK,如下所示-
步骤 4-要在您的系统上安装 grunt,您需要全局安装 Grunt 的命令行界面(CLI),如下所示-
运行上述命令会将
grunt 命令放在您的系统路径中,这使得它可以从任何目录运行。
安装
grunt-cli 不会安装 Grunt 任务运行器。
grunt-cli 的作用是运行安装在
Gruntfile 旁边的 Grunt 版本。它允许一台机器同时安装多个版本的 Grunt。
步骤 5-现在,我们将创建
配置文件以运行 Grunt。
package.json
package.json 文件放置在项目的根目录中,在
Gruntfile 旁边。
package.json 用于在与 package.json 相同的文件夹中运行命令
npm install 时正确运行每个列出的依赖项。
可以通过在命令提示符中键入以下命令来创建基本的
package.json-
基本的
package.json 文件如下所示-
{
   "name": "tutorialspoint",
   "version": "0.1.0",
   "devDependencies": {
      "grunt-contrib-jshint": "~0.10.0",
      "grunt-contrib-nodeunit": "~0.4.1",
      "grunt-contrib-uglify": "~0.5.0"
   }
}
您可以通过以下命令将 Grunt 和 gruntplugins 添加到现有的
pacakge.json 文件中-
npm install <module>--save-dev
在上面的命令中,
代表本地需要安装的模块。上面的命令还会自动将
添加到
devDependencies。
例如,以下命令将安装最新版本的
Grunt 并将其添加到您的
devDependencies-
npm install grunt--save-dev
Gruntfile.js
Gruntfile.js 文件用于定义我们的 Grunt 配置。这是我们的设置将被写入的地方。基本的
Gruntfile.js 文件如下所示-
// our wrapper function (required by grunt and its plugins)
// all configuration goes inside this function
module.exports = function(grunt) {
   // CONFIGURE GRUNT
   grunt.initConfig({
      // get the configuration info from package.json file
      // this way we can use things like name and version (pkg.name)
      pkg: grunt.file.readJSON('package.json'),
      // all of our configuration goes here
      uglify: {
         // uglify task configuration
         options: {},
         build: {}
      }
   });
   // log something
   grunt.log.write('Hello world! Welcome to Tutorialspoint!!\n');
   // Load the plugin that provides the "uglify" task.
   grunt.loadNpmTasks('grunt-contrib-uglify');
   // default task(s).
   grunt.registerTask('default', ['uglify']);
};

