| S.No | 软件和说明 |
| 1 | PostgreSQL 9.1
开源轻量级数据库
|
| 2 | PostgreSQL JDBC4 驱动程序
用于 PostgreSQL 9.1 和 JDK 的 JDBC 驱动程序1.5以上
|
create user user1;
create database testdb with owner = user1;
CREATE TABLE if NOT EXISTS authors (
    id int PRIMARY KEY,
    name VARCHAR(25)
);
INSERT INTO authors(id, name) VALUES(1, 'Rob Bal');
INSERT INTO authors(id, name) VALUES(2, 'John Carter');
INSERT INTO authors(id, name) VALUES(3, 'Chris London');
INSERT INTO authors(id, name) VALUES(4, 'Truman De Bal');
INSERT INTO authors(id, name) VALUES(5, 'Emile Capote');
INSERT INTO authors(id, name) VALUES(7, 'Breech Jabber');
INSERT INTO authors(id, name) VALUES(8, 'Bob Carter');
INSERT INTO authors(id, name) VALUES(9, 'Nelson Mand');
INSERT INTO authors(id, name) VALUES(10, 'Tennant Mark');
alter user user1 with password 'user1';
grant all on authors to user1;
| 步骤 | 描述 |
| 1 | 在com.tutorialspoint.test 包下创建一个名为helloworld 的项目,如JSF-第一个应用程序 章节所述。 |
| 2 | 在src → main文件夹下创建resources文件夹。 |
| 3 | 在src→main→resources文件夹下创建css文件夹。 |
| 4 | 在src→main→resources→css文件夹下创建styles.css文件。 |
| 5 | 修改 styles.css 文件,如下所述。 |
| 6 | 修改 pom.xml 如下所述。 |
| 7 | 在包 com.tutorialspoint.test 下创建 Author.java,如下所述。 |
| 8 | 在包 com.tutorialspoint.test 下创建 UserData.java,如下所述。 |
| 9 | 修改 home.xhtml 如下所述。保持其余文件不变。 |
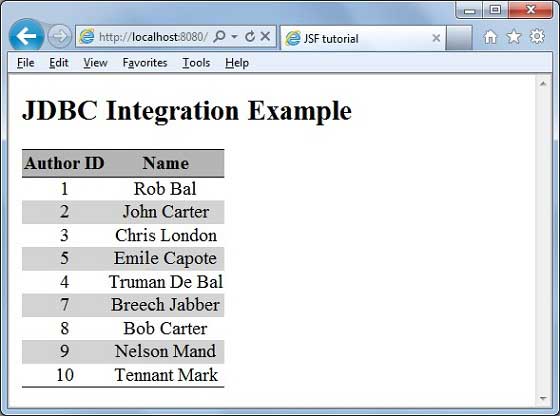
| 10 | 编译并运行应用程序以确保业务逻辑按照要求工作。 |
| 11 | 最后,以war文件的形式构建应用,并部署到Apache Tomcat Webserver中。 |
| 12 | 使用适当的 URL 启动您的 Web 应用程序,如下面最后一步所述。 |
.authorTable {
   border-collapse:collapse;
   border-bottom:1px solid #000000;
}
.authorTableHeader {
   text-align:center;
   background:none repeat scroll 0 0 #B5B5B5;
   border-bottom:1px solid #000000;
   border-top:1px solid #000000;
   padding:2px;
}
.authorTableOddRow {
   text-align:center;
   background:none repeat scroll 0 0 #FFFFFFF;
}
.authorTableEvenRow {
   text-align:center;
   background:none repeat scroll 0 0 #D3D3D3;
}
<project xmlns = "http://maven.apache.org/POM/4.0.0"
   xmlns:xsi = "http://www.w3.org/2001/XMLSchema-instance"
   xsi:schemaLocation = "http://maven.apache.org/POM/4.0.0
   http://maven.apache.org/maven-v4_0_0.xsd">

   <modelVersion>4.0.0</modelVersion>
   <groupId>com.tutorialspoint.test</groupId>
   <artifactId>helloworld</artifactId>
   <packaging>war</packaging>
   <version>1.0-SNAPSHOT</version>
   <name>helloworld Maven Webapp</name>
   <url>http://maven.apache.org</url >

   <dependencies>
      <dependency>
         <groupId>junit</groupId>
         <artifactId>junit</artifactId>
         <version>3.8.1</version>
         <scope>test</scope>
      </dependency>

      <dependency>
         <groupId>com.sun.faces</groupId>
         <artifactId>jsf-api</artifactId>
         <version>2.1.7</version>
      </dependency>

      <dependency>
         <groupId>com.sun.faces</groupId>
         <artifactId>jsf-impl</artifactId>
         <version>2.1.7</version>
      </dependency>

      <dependency>
         <groupId>javax.servlet</groupId>
         <artifactId>jstl</artifactId>
         <version>1.2</version>
      </dependency>

      <dependency>
        <groupId>postgresql</groupId>
        <artifactId>postgresql</artifactId>
        <version>9.1-901.jdbc4</version>
     </dependency>
   </dependencies>

   <build>
      <finalName>helloworld</finalName>
      <plugins>
         <plugin>
            <groupId>org.apache.maven.plugins</groupId>
            <artifactId>maven-compiler-plugin</artifactId>
            <version>2.3.1</version>
            <configuration>
               <source>1.6</source>
               <target>1.6</target>
            </configuration>
         </plugin>

         <plugin>
            <artifactId>maven-resources-plugin</artifactId>
            <version>2.6</version>
            <executions>
               <execution>
                  <id>copy-resources</id>
                  <phase>validate</phase>
                  <goals>
                     <goal>copy-resources</goal>
                  </goals>

                  <configuration>
                     <outputDirectory>${basedir}/target/helloworld/resources
                        </outputDirectory>
                     <resources>
                        <resource>
                           <directory>src/main/resources</directory>
                           <filtering>true</filtering>
                        </resource>
                     </resources>
                  </configuration>
               </execution>
            </executions>
         </plugin>

      </plugins>
   </build>
</project>
package com.tutorialspoint.test;
public class Author {
   int id;
   String name;

   public String getName() {
      return name;
   }

   public void setName(String name) {
      this.name = name;
   }

   public int getId() {
      return id;
   }

   public void setId(int id) {
      this.id = id;
   }
}
package com.tutorialspoint.test;
import java.io.Serializable;
import java.sql.Connection;
import java.sql.DriverManager;
import java.sql.PreparedStatement;
import java.sql.ResultSet;
import java.sql.SQLException;
import java.util.ArrayList;
import java.util.List;
import javax.faces.bean.ManagedBean;
import javax.faces.bean.SessionScoped;
import javax.faces.event.ComponentSystemEvent;
@ManagedBean(name = "userData", eager = true)
@SessionScoped
public class UserData implements Serializable {
   private static final long serialVersionUID = 1L;
   public List<Author> getAuthors() {
      ResultSet rs = null;
      PreparedStatement pst = null;
      Connection con = getConnection();
      String stm = "Select * from authors";
      List<Author> records = new ArrayList<Author>();

      try {
         pst = con.prepareStatement(stm);
         pst.execute();
         rs = pst.getResultSet();
         while(rs.next()) {
            Author author = new Author();
            author.setId(rs.getInt(1));
            author.setName(rs.getString(2));
            records.add(author);
         }
      } catch (SQLException e) {
         e.printStackTrace();
      }
      return records;
   }
   public Connection getConnection() {
      Connection con = null;
      String url = "jdbc:postgresql://localhost/testdb";
      String user = "user1";
      String password = "user1";

      try {
         con = DriverManager.getConnection(url, user, password);
         System.out.println("Connection completed.");
      } catch (SQLException ex) {
         System.out.println(ex.getMessage());
      }

      finally {
      }
      return con;
   }
}
<?xml version = "1.0" encoding = "UTF-8"?>
<!DOCTYPE html public "-//W3C//DTD XHTML 1.0 Transitional//EN"
"http://www.w3.org/TR/xhtml1/DTD/xhtml1-transitional.dtd">
<html xmlns = "http://www.w3.org/1999/xhtml"
   xmlns:f = "http://java.sun.com/jsf/core"
   xmlns:h = "http://java.sun.com/jsf/html">

   <h:head>
      <title>JSF Tutorial!</title>
      <h:outputStylesheet library = "css" name = "styles.css"  />
   </h:head>

   <h:body>
      <h2>JDBC Integration Example</h2>

      <h:dataTable value = "#{userData.authors}" var = "c"
         styleclass = "authorTable"
         headerclass = "authorTableHeader"
         rowClasses = "authorTableOddRow,authorTableEvenRow">

         <h:column><f:facet name = "header">Author ID</f:facet>
            #{c.id}
         </h:column>

         <h:column><f:facet name = "header">Name</f:facet>
            #{c.name}
         </h:column>
      </h:dataTable>
   </h:body>
</html>