MongoDB Stitch
MongoDB提供了一种无服务器平台,可在不设置服务器基础结构的情况下快速构建应用程序。 MongoDB Stitch被设计为MongoDB Atlas的升级版本。它会自动将连接集成到我们的数据库。 Stitch阐明了开发和实施过程。它通过忽略构建和部署后端的需求来实现这一目标。 MongoDB缝线作为后端服务提供,使我们能够轻松配置数据身份验证,数据访问规则和服务。
MongoDB Stitch提供了可升级的基础结构设计来处理请求。它还协调服务和数据库交互。也就是说,我们不需要在配置服务器等任务上花费时间和资源。
例如-我们可以使用MongoDB Stitch生成管道,该管道允许我们使用Stripe接受付款通过HTTP服务,更新购买日期并使用Mailgun服务发送确认电子邮件。
使用 Stitch UI创建 Stitch应用
步骤1: 转到 https://www.mongodb.com/cloud/atlas 页,然后登录到您的Atlas帐户。
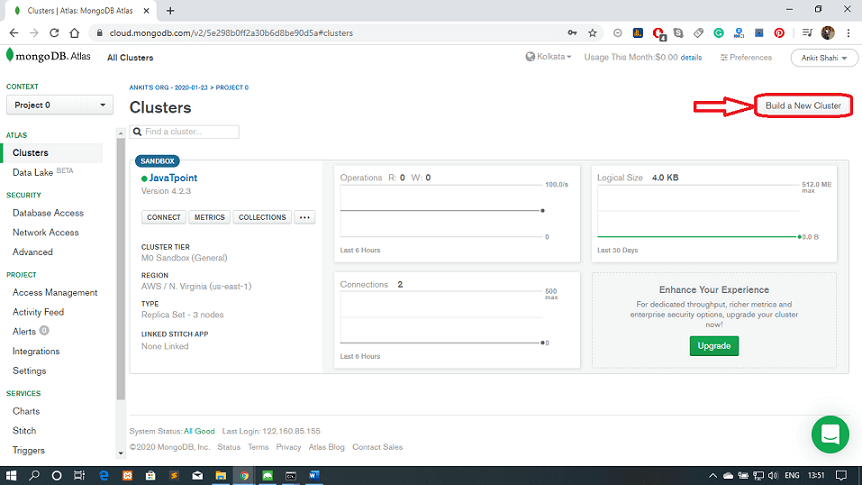
步骤2: 现在,您必须创建一个要与MongoDB Stitch应用程序一起使用的集群,请按照以下步骤操作:
单击左侧导航窗口中的 集群 按钮,然后单击 Build New Cluster 按钮。
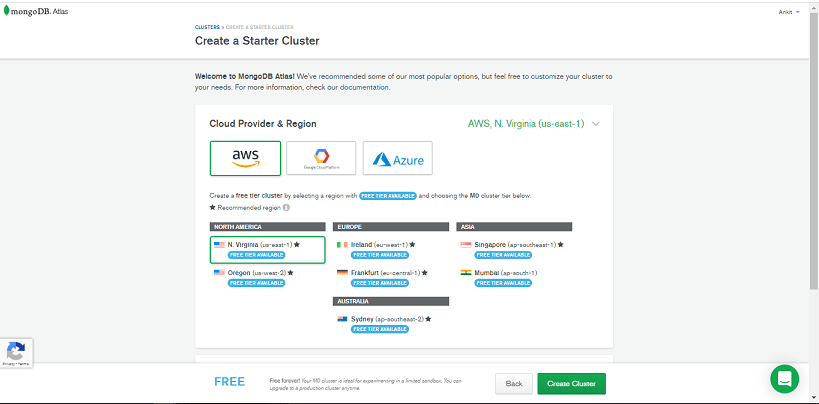
 选择首选的服务提供商,区域,层和其他必需的设置。
 默认情况下,群集的名称为 Cluster0 。如果要更改群集的名称,则必须执行此步骤,因为一旦配置后就无法更改群集名称。
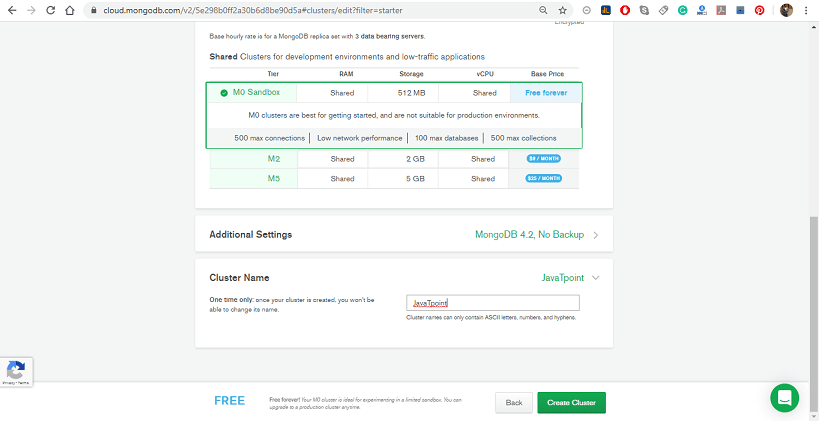 最后,单击"创建集群"按钮以保存所做的更改。
步骤3: 在 MongoDB地图集内,单击
Stitch Apps 。

步骤4: 之后,单击
创建新应用 按钮。

步骤5: 在"创建新应用程序"弹出窗口中,为您的 Stitch应用程序输入名称。
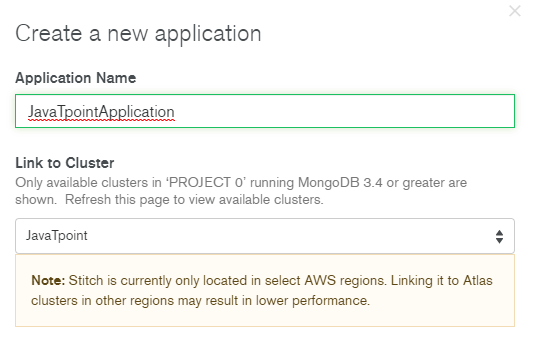
步骤6: 从
链接到群集 下拉对话框。 MongoDB Stitch会自动创建链接到集群的 MongoDB 服务。
步骤7 : 在
Stitch服务名称 字段中填写 Stitch将创建的服务的名称。
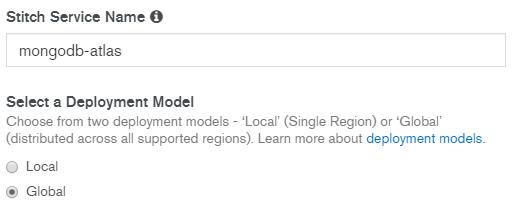
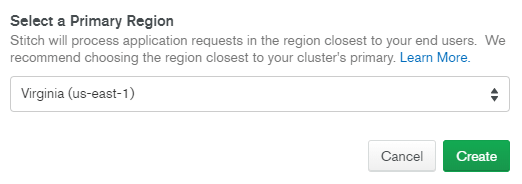
步骤8: 选择应用程序的部署模型和部署区域。然后单击
创建 按钮。
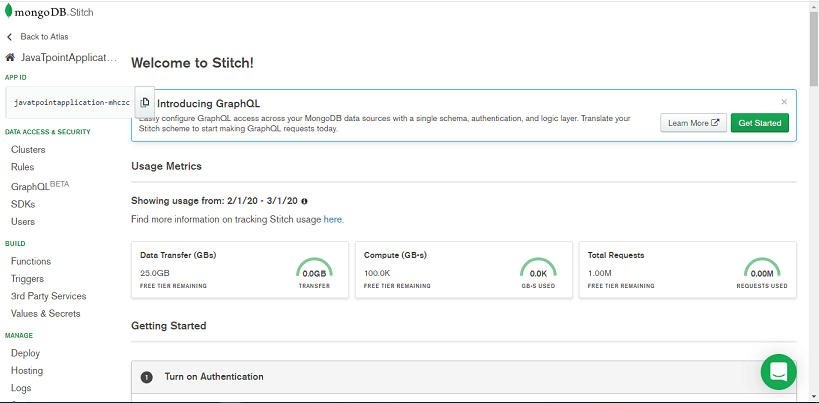
成功部署后,将显示以下窗口。
使用 Stitch CLI创建 Stitch应用程序
第1步: 首先,为您的应用程序创建一个新目录,并在该目录的根目录下添加一个itchle.json文件。该文件必须包含一个空的 JSON对象。
步骤2: 使用 API 密钥,通过Atlas对MongoDB Stitch应用程序进行身份验证。
Stitch-cli login --api-key=my-api-key --private-api-key=my-private-api-key
步骤3: 现在,使用" Stitch-cli import"命令导入 Stitch CLI库。
步骤4:
使用 Stitch查询任何地方
使用MongoDB查询语言,我们可以直接从客户端查询在MongoDB中存储的数据应用程序代码。 MongoDB集合的 Stitch服务器使我们能够根据登录的用户或每个文档的内容,使用指定的数据访问规则来安全地过滤结果。
Student集合包含描述每个学生的文档。一个示例拼贴。每个文档都包含学生的姓名,电子邮件,地址,费用以及学生信息流中的信息。在下面给出的示例中,我们将比较学生收集的所有文档,然后将格式化结果作为表格返回。
HTML文件:
<!-- Base  Stitch Browser SDK --> <script src="https://s3.amazonaws.com/ Stitch                      sdks/js/bundles/4.0.13/ Stitch.js"></script>
<div class="results-bar">
  <p>Count of Results:</p>
  <span id="num-results" class="results-bar__count"></span>
</div>
<table class="table table-striped">
  <thead class="thead">
    <tr>
      <th>Name</th>
      <th>Email</th>
      <th>Class</th>
      <th>Batch</th>
      <th>Fees</th>
    </tr>
  </thead>
  <tbody id='students'></tbody>
</table>
Java脚本文件:
const {
   Stitch,
  RemoteMongoClient,
  UserPasswordCredential
} =  Stitch;
const  StitchClient =  Stitch.initializeDefaultAppClient(" Stitch-quickstarts-zhpox");
login("lidihuo@example.com", "password123").then(() => {
  // Initialize a MongoDB Service Client
  const mongodb =  StitchClient.getServiceClient( RemoteMongoClient.factory,
    "mongodb-atlas");
  // Get a hook to the student collection
  const students = mongodb.db("Admin").collection("students");

  return students.find({}, {
    // limit: 2,
    // sort: { "fees": -1 }
  })
    .asArray();
})
  .then(displayStudents)
function login(email, password) {
  const credential = new UserPasswordCredential(email, password);
  return  StitchClient.auth.loginWithCredential(credential);
}
// Renders the the students' information in the table
function displayStudents(students) {
  const employeesTableBody = document.getElementById("students");
  const numResultsEl = document.getElementById("num-results");
  const tableRows = students.map(student => {
    return '
      <tr>
        <td>${student.name.last}, ${student.name.first}</td>
        <td>${student.email}</td>
        <td>${student.role}</td>
        <td>${student.manager.name.first}${student.manager.name.last} (${student.admin.id || "no manager"})</td>
        <td>${student.fees}</td>
      </tr>
    ';
  });
  studentTableBody.innerHTML = tableRows.join("");
  numResultsEl.innerHTML = student.length;
}
使用规则保护数据
如果我们不想让每个学生看到其他学生的数据,则可以使用收集规则。我们可以使用它来控制所有用户都可以访问的数据,而无需更改查询的模式。
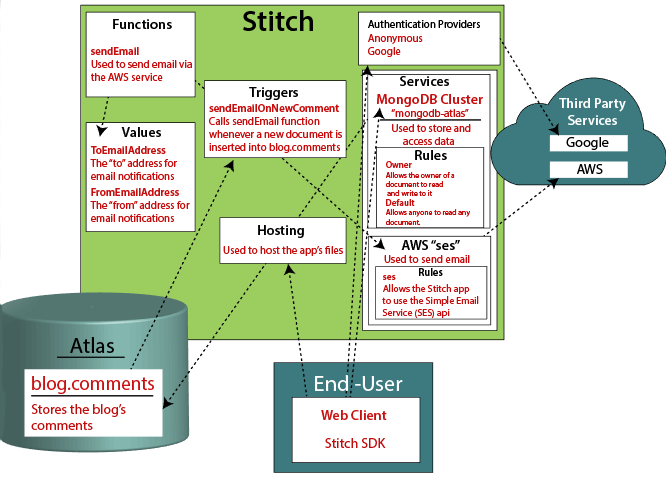
创建博客应用程序
此处我们正在创建使用 Stitch的博客和评论系统。我们正在使用MongoDB Stitch JavaScript SDK和MongoDB服务直接从客户端代码添加和查询注释。
博客应用程序的体系结构
博客应用程序的体系结构需要以下功能:
登录功能。
博客帖子存储功能。
博客发布评论功能。
使用MongoDB Atlas Cluster时,我们可以存储评论和身份验证详细信息,以允许用户使用临时帐户发布评论。
博客架构的三个主要组成部分是:
网络前端
缝合应用
MongoDB Atlas数据库。
博客应用程序体系结构的前端处理显示和用户交互。 Stitch管理来自前端的所有请求,仅允许将经过验证的请求发送到数据库,从而为我们的用户保存评论。
为博客应用创建后端
博客应用程序的后端用于存储评论和其他详细信息,例如-验证和授权用户,查找博客帖子的现有评论等。我们将评论存储在MongoDB应用程序示例中。在这里,我们将限制用户创建,编辑和删除仅与他们的用户ID相关联的注释的权限。我们还需要确保一个用户不能以其他用户身份登录;我们可以使用MongoDB Stitch中的内置用户管理系统来实现此目的。
要求:
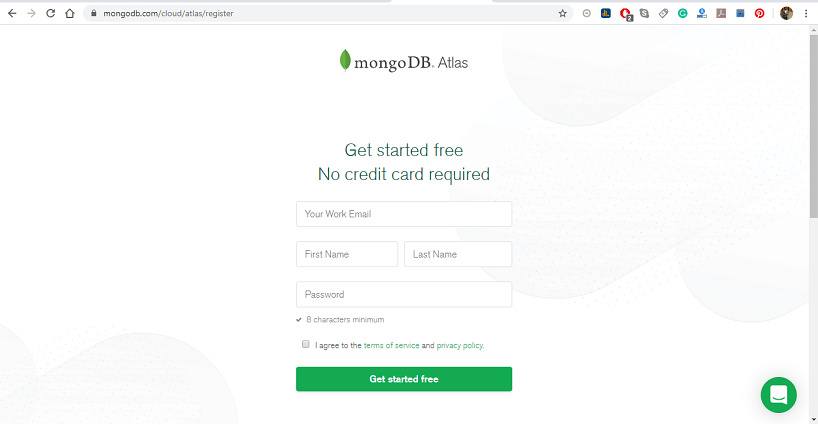
MongoDB Atlas帐户。
以及在Atlas上托管的MongoDB集群。我们建议您创建一个免费的M0 Atlas集群,并且易于学习。
步骤1: 按照上面的指示创建 Stitch应用程序。
步骤2: 启用 Stitch内部的匿名身份验证。
步骤3: 最后,配置
blog.comments 。
从 Stitch UI的左侧导航栏中单击MongoDB Atlas下的规则。
然后,单击添加收藏集。
现在,输入Blog作为数据库名称,并输入注释作为Collection名称。
选择"无模板"选项,然后单击"添加收藏集"。
步骤4: 启用对评论的阅读和书写。
步骤5: 最后,通过单击在 Stitch GUI 顶部的弹出窗口中,
查看和部署更改。
为博客应用创建Web客户端
步骤1: 创建HTML 页面如下。
<html>
  <head>
  </head>
  <body>
    <h3>this is the first blog post of lidihuo</h3>
    <div id="content">
      Learn technology from lidihuo to keep yourself industry ready.
    </div>
    <hr>
    <div id="comments"></div>
  </body>
</html>
步骤2: 现在,附加以下JavaScript SDK。附加MongoDB Stitch SDK。将下面给出的脚本标记添加到html文件的头部。
<script src="https://s3.amazonaws.com/ Stitch-sdks/js/bundles/4/ Stitch.js"></script>
步骤3: 初始化应用程序客户端和MongoDB Service客户端,以将评论存储在MongoDB中。将应用程序ID替换为 Stitch
<应用程序id>
。您可以在 Stitch Interface的客户端页面上找到您的App ID。
<script>
  // it initializing the App Client
  const client =  Stitch. Stitch.initializeDefaultAppClient("<give-your-app-id-here>");
  // Now, it will get a MongoDB Service Client
  const mongodb = client.getServiceClient(
     Stitch.RemoteMongoClient.factory,
    "mongodb-atlas"
  );
  // Getting a reference to the blog database
  const db = mongodb.db("blog");
</script>
步骤4: 现在,添加下面给出的脚本以在页面加载时查询并显示注释。
function displayComments() {
  db.collection("comments")
    .find({}, {limit: 1000})
    .toArray()
    .then(docs => {
      const html = docs.map(doc => '<div>${doc.comment}</div>');
      document.getElementById("comments").innerHTML = html;
    });
}
第5步: 您必须创建一个文件,允许用户在加载期间登录并显示评论。
function displayCommentsOnLoad() {
  client.auth
    .loginWithCredential(new  Stitch.AnonymousCredential())
    .then(displayComments)
    .catch(console.error);
}
步骤6: 现在,创建一个表单以提交评论。
function addComment() {
  const newComment = document.getElementById("new_comment");
  console.log("add comment", client.auth.user.id)
  db.collection("firstcomment")
    .insertOne({ owner_id : client.auth.user.id, comment: newComment.value })
    .then(displayComments);
  newComment.value = "";
}

