让我们更新 poll detail 模板(“polls/detail.html”) ,从上个教程,在模板 polls/templates/polls/detail.html 包含一个HTML<form>元素:
# Filename : example.py
# Copyright : 2020 By Lidihuo
# Author by : www.lidihuo.com
# Date : 2020-08-23
<h1>{{ question.question_text }}</h1>
{% if error_message %}<p><strong>{{ error_message }}</strong></p>{% endif %}
<form action="{% url 'polls:vote' question.id %}" method="post">
{% csrf_token %}
{% for choice in question.choice_set.all %}
<input type="radio" name="choice" id="choice{{ forloop.counter }}" value="{{ choice.id }}" />
<label for="choice{{ forloop.counter }}">{{ choice.choice_text }}</label><br />
{% endfor %}
<input type="submit" value="Vote" />
</form>
简要介绍:
上面的模板显示每个问题选择一个单选按钮。每个单选按钮的值相联问题的选择编号。每个单选按钮的名称是“choice”。这意味着,当有人选择了其中一个单选按钮并提交表单,它会发送POST数据choice=#,其中#是被选择的选择的ID。这是HTML表单的基本概念。
我们设置表单的动作 {% url 'polls:vote' question.id %}, 以及设置 method="post". 使用 method="post" (相对于 method="get") 是非常重要的,因为提交此表将改变服务器端数据的行为。当创建一个改变数据服务器端表单形式,使用 method="post". 这篇文章并不是只针对 Django; 这是一个很好的 Web 开发实践。
forloop.counter表示表单标签通过多少次循环了
因为我们正在创建一个POST形式(可以有修改数据的影响),我们需要担心跨站点请求伪造。但是也不必担心,因为Django自带了保护对抗的一个非常容易使用的系统。总之,这是针对内部URL所有的POST形式应该使用{%csrf_token%}模板标签。
现在,让我们创建一个处理提交的数据的一个 Django 视图。
polls/urls.py文件内容如下:
# Filename : example.py
# Copyright : 2020 By Lidihuo
# Author by : www.lidihuo.com
# Date : 2020-08-23
url(r'^(?P<question_id>[0-9]+)/vote/, views.vote, name='vote'), , views.vote, name='vote'),
我们还创建了一个虚拟实现 vote() 函数。现在创建一个实用的版本。添加到以下代码到文件 polls/views.py:
polls/views.py 文件的内容如下:
# Filename : example.py
# Copyright : 2020 By Lidihuo
# Author by : www.lidihuo.com
# Date : 2020-08-23
from django.shortcuts import get_object_or_404, render
from django.http import HttpResponseRedirect, HttpResponse
from django.core.urlresolvers import reverse
from .models import Choice, Question
# ...
def vote(request, question_id):
question = get_object_or_404(Question, pk=question_id)
try:
selected_choice = question.choice_set.get(pk=request.POST['choice'])
except (KeyError, Choice.DoesNotExist):
# Redisplay the question voting form.
return render(request, 'polls/detail.html', {
'question': question,
'error_message': "You didn't select a choice.",
})
else:
selected_choice.votes += 1
selected_choice.save()
# Always return an HttpResponseRedirect after successfully dealing
# with POST data. This prevents data from being posted twice if a
# user hits the Back button.
return HttpResponseRedirect(reverse('polls:results', args=(question.id,)))
此代码包含还没有在本教程中涉及几个东西:
request.POST是一个类似于字典的对象,使您可以通过键名访问提交的数据。在这种情况下,request.POST['choice'] 返回被选择的choice的ID,作为字符串。 request.POST的值总是字符串。
注意:Django还提供 request.GET 以相同的方式访问 GET数据 – 但我们明确使用 request.POST 在我们的代码,以确保数据只能通过POST调用修改。
如果POST数据未提供choice,request.POST['choice']将引发KeyError异常。上面的代码检查KeyError异常和错误消息显示问题的表单,如果没有给出
choice。
选择choice计数递增后,代码返回 HttpResponse 重定向,而不是一个正常的 HttpResponse。HttpResponseRedirect 需要一个参数:用户将被重定向到URL(请参阅下面-我们如何构建在这种情况下的URL)。
如上Python的注释所指出的,应该总是在 POST 数据处理成功
后返回一个HttpResponse重定向。
在本例中我们使用的是 HttpResponseRedirect 构造reverse()函数。此函数有助于避免硬编码URL在视图中。这是因为我们想通过控制并指向该视图的URL模式的可变部分的视图的名称。在这种情况下,使用 URLconf 配置使 reverse()调用返回字符串如:
# Filename : example.py
# Copyright : 2020 By Lidihuo
# Author by : www.lidihuo.com
# Date : 2020-08-23
'/polls/3/results/'
其中3是question.id的值。然后,这个重定向的URL将调用“results”视图中显示的最后一页。
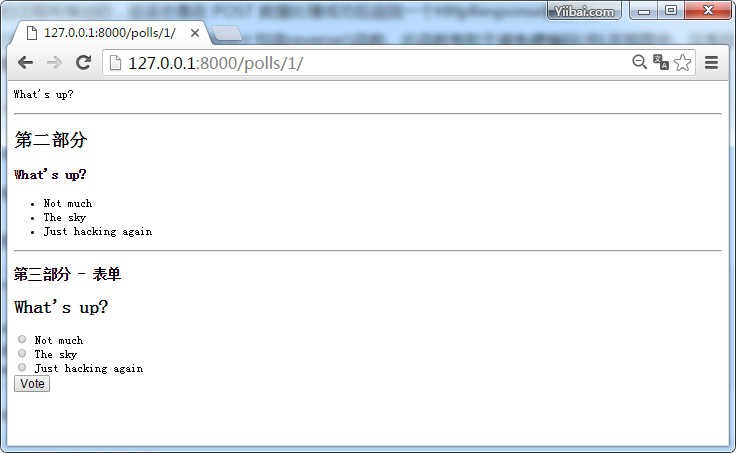
现在访问网址:http://127.0.0.1:8000/polls/1/ 得到结果如下所示:
当有人在一个问题投票后,vote() 视图重定向到该问题的结果页面。让我们编写这个视图(polls/views.py):
# Filename : example.py
# Copyright : 2020 By Lidihuo
# Author by : www.lidihuo.com
# Date : 2020-08-23
from django.shortcuts import get_object_or_404, render
def results(request, question_id):
question = get_object_or_404(Question, pk=question_id)
return render(request, 'polls/results.html', {'question': question})
现在,创建一个 polls/results.html (polls/templates/polls/results.html)模板:
# Filename : example.py
# Copyright : 2020 By Lidihuo
# Author by : www.lidihuo.com
# Date : 2020-08-23
<h2>{{ question.question_text }}</h2>
<ul>
{% for choice in question.choice_set.all %}
<li>{{ choice.choice_text }} -- {{ choice.votes }} vote{{ choice.votes|pluralize }}</li>
{% endfor %}
</ul>
<a href="{% url 'polls:detail' question.id %}">Vote again?</a>
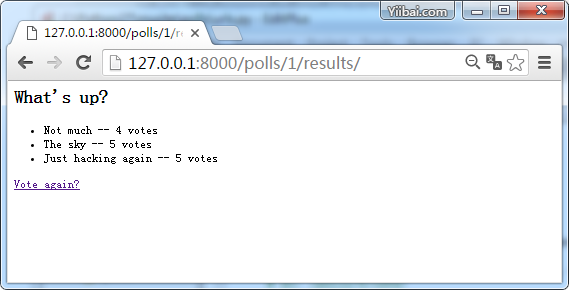
现在,在浏览器中打开 /polls/1/ 并表决的问题。应该会被每次投票时看到更新结果页。如果您提交表单不选择一个选项,应该看到错误消息。 选择选项,提交后显示如下结果:
from django.conf.urls import url
from . import views

app_name = 'polls'
urlpatterns = [
    url(r'^$', views.IndexView.as_view(), name='index'),
    url(r'^(?P<pk>[0-9]+)/$', views.DetailView.as_view(), name='detail'),
    url(r'^(?P<pk>[0-9]+)/results/$', views.ResultsView.as_view(), name='results'),
    url(r'^(?P<question_id>[0-9]+)/vote/$', views.vote, name='vote'),
]

