TestNG 排除/包含用例
排除/包含测试用例
TestNG 提供启用和禁用测试用例的功能。我们可以禁止执行一组测试用例。例如,考虑一个场景,由于某些测试,某个特性出现了严重的错误,因此我们需要禁用测试用例的执行。
在TestNG中,可以禁用测试用例两种方式:
您可以在 @Test 注释中禁用测试用例。
您可以在 XML 文件中禁用测试用例。
TestNG @Test 启用参数
您可以通过在@Test 注解中使用 enable 属性并为 enable 属性分配 False 值来禁用或排除测试用例.
我们通过一个例子来理解:
package day1;
import org.testng.annotations.Test;
public class module1
{
  @Test(enabled=false)
  public void test1()                                          // First test case
  {
    System.out.println("Hello lidihuo!!");
  }

  @Test
  public void test2()                                          // Second test case
  {
    System.out.println("JTP Travels");
  }}
在上面的代码中,我们创建了两个测试用例,即 test1() 和 test2(),我们通过将 False 值分配给 enable 属性来禁用第一个测试用例。禁用第一个测试用例后,将运行唯一的第二个测试用例。
输出
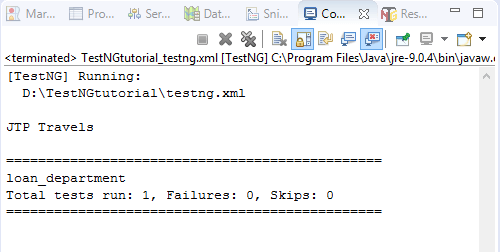
在上面的输出中,我们观察到只有第二个测试用例运行没有任何失败。
禁用 XML 文件中的 enable 属性。
第 1 步: 至此,我们已经创建了个人贷款部门的测试用例。
module1.java
package day1;
import org.testng.annotations.Test;
public class module1
{
  @Test
  public void test1()
  {
    System.out.println("Hello lidihuo!!");
  }

  @Test
  public void test2()
  {
    System.out.println("JTP Travels");
  }}
module2.java
package day1;
import org.testng.annotations.Test;
public class module2
{
 @Test
 public void WebLoginCarLoan()
 {
   System.out.println("WebLoginCarLoan");
 }
 @Test
 public void MobileLoginCarLoan()
 {
   System.out.println("MobileLoginCarLoan");
 }
 @Test
 public void APILoginCarLoan()
 {
   System.out.println("APILoginCarLoan");
 }

}
module1.java 包含个人贷款的测试用例,而module2.java 包含汽车贷款的测试用例。
第2步: 如果我们想在汽车贷款模块中禁用MobileLoginCarLoan测试用例,那么我们需要在xml文件中添加
标签,该标签可以访问一个类的所有方法。
<?xml version="1.0" encoding="UTF-8"?>
<!DOCTYPE suite SYSTEM "http://testng.org/testng-1.0.dtd">
<suite name="loan_department">
  <test name="Personal_loan">
  <classes>
  <class name="day1.module1"/>
  </classes>
  </test> <!--Test-->
  <test name="Car_loan">
  <classes>
  <class name="day1.module2">
  <methods>
  <exclude name = "MobileLoginCarLoan"/>
  </methods>
  </class>
  </classes>
  </test>
</suite> <!--Suite-->
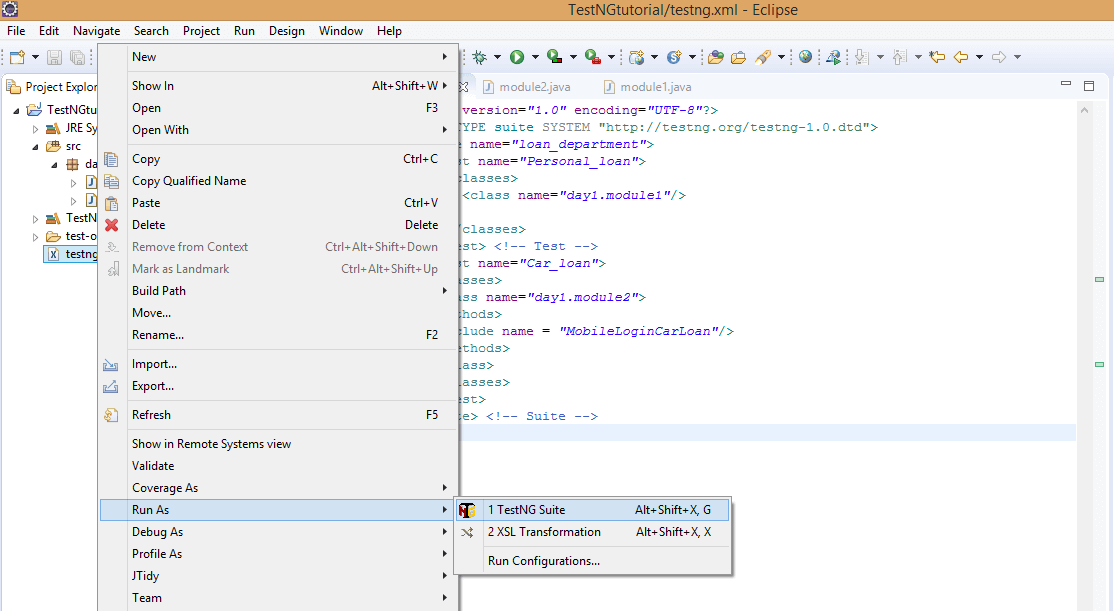
第 3 步: 运行 testng.xml 文件。右键单击 testng.xml 文件,然后向下移动光标,您将看到 Run As,然后单击 1 TestNG Suite .
输出
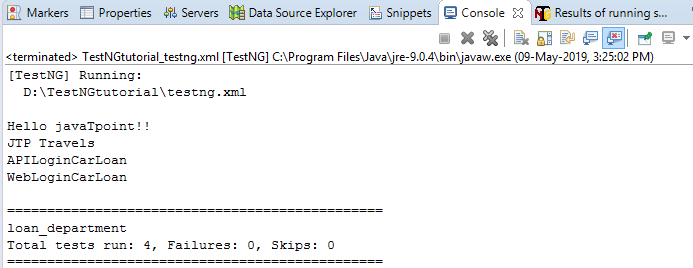
在上面的输出中,我们观察到所有的测试除了我们已经排除的测试用例"MobileLoginCarLoan"之外,案例运行成功。
注意: 假设我们有多个测试用例,而您只想包含一两个测试用例,在这种情况下,我们使用 <include> 标签。如果我们使用 <exclude>标签,那么排除所有测试用例就变得非常乏味。
通过一个<include>标签的例子来理解。
test.java文件强>
package day1;
import org.testng.annotations.Test;
public class test
{
 @Test
 public void test1()
 {
   System.out.println("test1");
 }

 @Test
 public void test2()
 {
   System.out.println("test2");
 }

 @Test
 public void test3()
 {
   System.out.println("test3");

 }
 @Test
 public void test4()
 {
   System.out.println("test3");
 }
}
testng.xml 文件
<?xml version="1.0" encoding="UTF-8"?>
<!DOCTYPE suite SYSTEM "http://testng.org/testng-1.0.dtd">
<suite name="test_suite">
 <test name="test">
 <classes>
 <class name="day1.test">
 <methods>
 <include name="test3"/>
 </methods>
 </class>
 </classes>
  </test> <!--Test-->

</suite> <!--Suite-->
输出
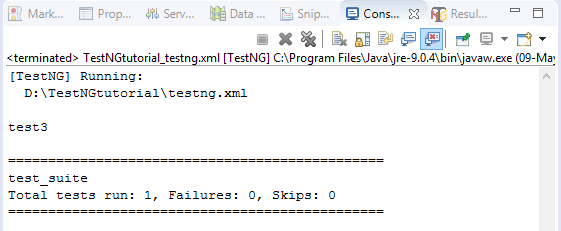
在上面的输出中,我们观察到只有一个测试用例正在运行,即 test3,因为我们在 XML 文件的 <include> 标签中只包含了 test3、

