TestNG Groups
TestNG Groups
TestNG Groups 允许您对不同的测试方法进行分组。访问不同类的测试方法时,需要对测试方法进行分组。
不仅可以声明指定组内的方法,还可以声明指定组内的其他组。因此,可以要求 TestNG 包括一组特定的组,同时排除另一组组。
它通过将测试方法划分为组来为您提供最大的灵活性,并且如果您运行,则不需要重新编译测试用例您的两组不同的测试用例背靠背。
在 testng.xml 文件中使用
标记指定组。组可以在
标签或
标签中指定。如果在
标签内指定了
标签,则它会应用于 XML 文件的所有
标签。如果
标签是在特定的
文件夹中指定的,那么它只会应用于该特定的
标签。
让我们通过一个例子来理解 TestNG Groups 的概念:
组内的测试用例
第一种情况: 当
标签定义在
标签内时.
第一步: 打开Eclipse。
第二步: 我们创建三个java项目,即Personal_loan.java 、Home_loan.java 和 Car_loan.java。
Personal_loan.java
package com.lidihuo;
import org.testng.annotations.Test;
public class Personal_loan
{
 @Test(groups= {"SmokeTest"})
 public void WebLoginPersonalLoan()
 {
     System.out.println("Web Login Personal Loan");
 }
 @Test
 public void MobileLoginPersonalLoan()
 {
     System.out.println("Mobile Login Personal Loan");
 }
 @Test
 public void APILoginPersonalLoan()
 {
     System.out.println("API Login Personal Loan");
 }
}
Home_loan.java
package com.lidihuo;
import org.testng.annotations.Test;
public class Home_loan
{
@Test
public void WebLoginHomeLoan()
{
  System.out.println("Web Login Home Loan");
}
@Test(groups= {"SmokeTest"})
public void MobileLoginHomeLoan()
{
  System.out.println("Mobile Login Home Loan");
}
@Test
public void APILoginHomeLoan()
{
  System.out.println("API Login Home Loan");
}
}
Car_loan.java
package com.lidihuo;
import org.testng.annotations.Test;
public class Car_loan
{
@Test
public void WebLoginCarLoan()
{
System.out.println("Web Login Home Loan");
}
@Test
public void MobileLoginCarLoan()
{
System.out.println("Mobile Login Home Loan");
}
@Test(groups= {"SmokeTest"})
public void APILoginCarLoan()
{
System.out.println("API Login Home Loan");
}
}
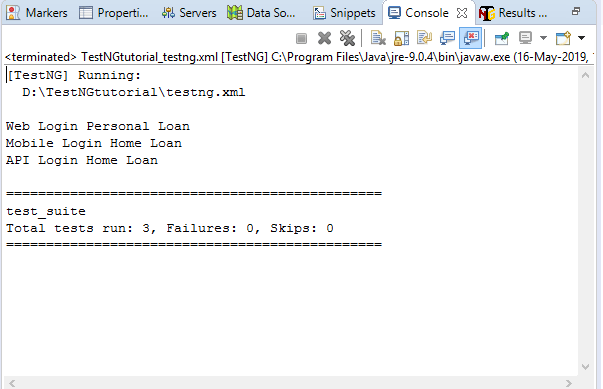
在上面的例子中,我们为三个不同类别的三个测试用例提供了一个组名,即SmokeTest。
步骤3: 现在,我们创建一个 testng.xml 文件,在其中配置我们创建的类并添加新标签
。我们要执行那些包含"SmokeTest"组的测试用例。
<?xml version="1.0" encoding="UTF-8"?>
<!DOCTYPE suite SYSTEM "http://testng.org/testng-1.0.dtd">
<suite name="test_suite">
<groups>
<run>
<include name="SmokeTest"/>
</run>
</groups>
<test name="Personal Loan">
<classes>
<class name="com.lidihuo.Personal_loan"/>
</classes>
</test> <!--Test-->
<test name="Home Loan">
<classes>
<class name="com.lidihuo.Home_loan"/>
</classes>
</test> <!--Test-->
<test name="Car Loan">
<classes>
<class name="com.lidihuo.Car_loan"/>
</classes>
</test> <!--Test-->
</suite> <!--Suite-->
输出
第二情况: 当 <groups> 标签定义在 <test>标签。</test>
testng.xml 看起来像:
<?xml version="1.0" encoding="UTF-8"?>
<!DOCTYPE suite SYSTEM "http://testng.org/testng-1.0.dtd">
<suite name="test_suite">
<test name="Loan">
<groups>
<run>
<include name="SmokeTest"/>
</run>
</groups>
 <classes>
 <class name="com.lidihuo.Personal_loan"/>
 <class name="com.lidihuo.Home_loan"/>
  <class name="com.lidihuo.Car_loan"/>
  </classes>
  </test> <!--Test-->
 </suite> <!--Suite-->
属于多个组的测试
第 1 步: 打开 Eclipse。
第 2 步: 我们创建了一个名为"Groups.java"的 java 项目。
Groups.java
package com.lidihuo;
import org.testng.annotations.Test;
public class Groups {
@Test(groups= {"Group A"})
public void testcase1()
{
System.out.println("Test case belonging to Group A");
}
@Test(groups= {"Group A","Group B"})
public void testcase2()
{
System.out.println("Test case belonging to both Group A and Group B");
}
@Test(groups= {"Group B"})
public void testcase3()
{
System.out.println("Test case belonging to Group B");
}
}
在上面的代码中,我们定义了两个组,即Group A和Group B。 testcase1()被标记为'Group A',testcase2被标记为'Group A'和'Group B'两组,并且 testcase3() 被标记为"B 组"。
第 3 步: 我们创建 testng.xml 文件来配置 Groups 类.
testng.xml 文件
<?xml version="1.0" encoding="UTF-8"?>
<!DOCTYPE suite SYSTEM "http://testng.org/testng-1.0.dtd">
<suite name="test_suite">
<test name="Group A">
<groups>
<run>
<include name="Group A"/>
</run>
</groups>
<classes>
<class name="com.lidihuo.Groups"/>
</classes>
</test> <!--Test-->
<test name="Group B">
<groups>
<run>
<include name="Group B"/>
</run>
</groups>
<classes>
<class name="com.lidihuo.Groups"/>
</classes>
</test> <!--Test-->
</suite> <!--Suite-->
第 4 步: 右键单击 testng.xml 文件运行 testng.xml 文件。
输出

包括/排除组
步骤1: 打开 Eclipse。
步骤2: 我们创建一个新的 Java 项目。
groups.java
package com.lidihuo;
import org.testng.annotations.Test;
public class Groups
{
@Test(groups= {"Include Group"})
public void test_case1()
{
System.out.println("this is test case 1");
}
@Test(groups= {"Include Group"})
public void test_case2()
{
System.out.println("this is test case 2");
}
@Test(groups= {"Exclude Group"})
public void test_case3()
{
System.out.println("this is test case 3");
}
}
第 3 步: 我们将创建 testng.xml 文件。
testng.xml 文件
<?xml version="1.0" encoding="UTF-8"?>
<!DOCTYPE suite SYSTEM "http://testng.org/testng-1.0.dtd">
<suite name="test_suite">
<test name="Include and Exclude Group">
<groups>
<run>
<include name="Include Group"/>
<exclude name="Exclude Group"/>
</run>
</groups>
<classes>
<class name="com.lidihuo.Groups"/>
</classes>
 </test> <!--Test-->
 </suite> <!--Suite-->
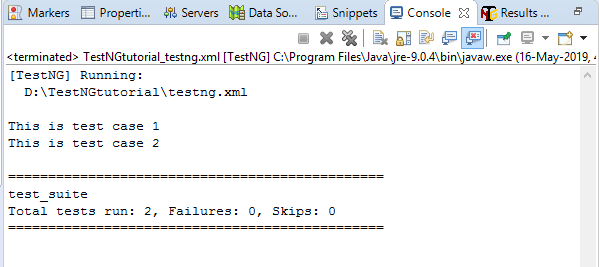
第 4 步: 运行 testng.xml 文件。
输出
使用正则表达式
我们也可以在 TestNG 组中使用正则表达式。
我们通过一个例子来理解:
第一步: 打开Eclipse。
第二步: 我们创建了一个名为"Regular_Expression.java"的 java 项目。
Regular_Expression.java
package com.lidihuo;
import org.testng.annotations.Test;
public class Regular_Expression {
@Test(groups= {"Include test case1"})
public void test_case1()
{
System.out.println("this is test case 1");
}
@Test(groups= {"Include test case2"})
public void test_case2()
{
System.out.println("this is test case 2");
}
@Test(groups= {"Exclude test case3"})
public void test_case3()
{
System.out.println("this is test case 3");
}
}
第 3 步: 现在我们创建 testng.xml 文件来配置上述类。
<?xml version="1.0" encoding="UTF-8"?>
<!DOCTYPE suite SYSTEM "http://testng.org/testng-1.0.dtd">
<suite name="test_suite">
<test name="Including test cases">
<groups>
<run>
<include name="Include.*"/>
</run>
</groups>
<classes>
<class name="com.lidihuo.Regular_Expression"/>
</classes>
</test> <!--Test-->
</suite> <!--Suite-->
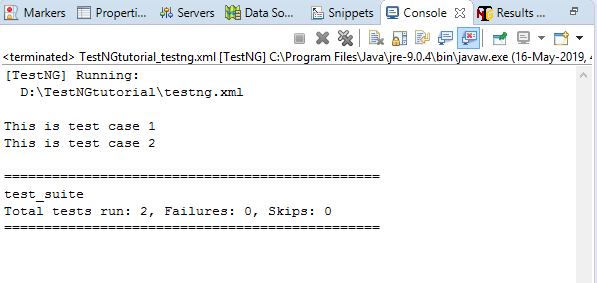
第 4 步: 运行 testng.xml 文件。
输出
组中的组
我们也可以在另一个组中指定一个组。在另一个组中定义的组称为元组。
让我们通过一个例子来理解:
第 1 步: 打开 Eclipse。
第 2 步: 我们创建一个名为"Groups_in_Groups"的 Java 项目。
Groups_in_Groups.java
package com.lidihuo;
import org.testng.annotations.Test;
public class Groups_in_Groups
{
 @Test(groups= {"Smoke"})
 public void test1()
 {
     System.out.println("test1");
 }
 @Test(groups= {"Regression"})
 public void test2()
 {
     System.out.println("test2");
 }
 @Test
 public void test3()
 {
     System.out.println("test3");
 }}
第 3 步: 现在我们创建一个 testng.xml 文件,我们在其中配置上述类。
testng.xml 文件
<?xml version="1.0" encoding="UTF-8"?>
<!DOCTYPE suite SYSTEM "http://testng.org/testng-1.0.dtd">
<suite name="test_suite">
<test name="Groups in Groups">
<groups>
<define name="Group 1">
<include name="Smoke"/>
<include name="Regression"/>
</define>
<run>
<include name="Group 1"/>
</run>
</groups>
<classes>
<class name="com.lidihuo.Groups_in_Groups"/>
</classes>
</test> <!--Test-->
</suite> <!--Suite-->
在上面的 xml 文件中,我们在另一个名为"Group 1"的组中定义了一个新组,我们包含了那些标记为"Smoke"和"Regression"的测试用例。
第 4 步: 运行 testng.xml 文件。
输出


