Vue.js 渲染功能
Vue.js建议我们使用模板来构建HTML。在这里,我们可以将render函数用作模板的更接近编译器的替代方法。
Vue.js渲染函数也与Vue.js组件一起使用。大多数时候,render函数是由Vue.js编译器创建的。当您在组件上指定模板时,该模板的内容由Vue.js编译器处理,该编译器将返回渲染功能。呈现函数本质上返回一个虚拟DOM节点,该节点将由Vue.js在您的浏览器DOM中呈现。
什么是虚拟文档对象模型或" DOM"?
虚拟DOM允许
Vue.js 在更新浏览器之前将其组件呈现在其内存中。这使一切变得更快,因为它只需要与浏览器进行少量交互即可。 Vue.js更新浏览器DOM时,会将更新的虚拟DOM与上一个虚拟DOM进行比较,并使用修改后的部分更新实际DOM。这样便可以提高性能。
让我们以一个简单组件为例,看看在示例中使用render函数时效果如何。
index.html文件:
<html>
<head>
<title>Vue.js Component</title>
<link rel="stylesheet" href="index.css">
<script src="https://cdn.jsdelivr.net/npm/vue/dist/vue.js"></script>
</head>
<body>
<div id = "component_test">
<testcomponent></testcomponent>
</div>
<script src="index.js"></script>
</body>
</html>
Index.js文件:
Vue.component('testcomponent',{
template : '<h1>Hello Students!</h1>'
});
var vm = new Vue({
el: '#component_test'
})
我们使用一个简单的CSS文件使输出更具吸引力。
Index.css文件:
html, body {
margin: 5px;
padding: 0;
}
程序执行后,您将看到以下输出:
输出:
在这里,您可以看到该组件将上述结果显示为Hello Students。现在,如果您重复使用该组件,您将看到结果将被一次又一次地打印。例如,
<div id = "component_test">
<testcomponent></testcomponent>
<testcomponent></testcomponent>
<testcomponent></testcomponent>
<testcomponent></testcomponent>
<testcomponent></testcomponent>
</div>
输出:

假设您不希望一次又一次地打印相同的文本,那么您会怎么做?让我们进行一些更改,然后在组件内键入以下内容:
Index.html文件:
<html>
<head>
<title>Vue.js Component</title>
<link rel="stylesheet" href="index.css">
<script src="https://cdn.jsdelivr.net/npm/vue/dist/vue.js"></script>
</head>
<body>
<div id = "component_test">
<testcomponent>Hello Rahul!</testcomponent>
<testcomponent>Hello James!</testcomponent>
<testcomponent>Hello Alex!</testcomponent>
<testcomponent>Hello Priti!</testcomponent>
<testcomponent>Hello Mohan!</testcomponent>
</div>
<script src="index.js"></script>
</body>
</html>
Index.js文件与上面的文件相同。
程序执行后,您将看到以下输出:
输出:
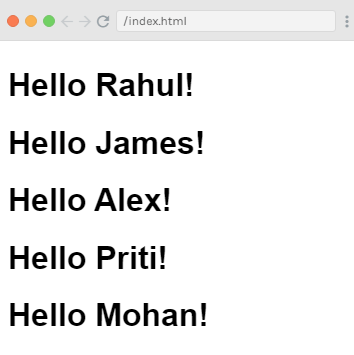
您可以看到输出与较早。
使用插槽
现在,我们将使用组件提供的插槽来获得所需的结果。
语法:
template : '<h1><slot></slot></h1>',
请参见以下示例:
Index.html文件:
<html>
<head>
<title>Vue.js Component</title>
<link rel="stylesheet" href="index.css">
<script src="https://cdn.jsdelivr.net/npm/vue/dist/vue.js"></script>
</head>
<body>
<div id = "component_test">
<testcomponent>Hello Rahul!</testcomponent>
<testcomponent>Hello James!</testcomponent>
<testcomponent>Hello Alex!</testcomponent>
<testcomponent>Hello Priti!</testcomponent>
<testcomponent>Hello Mohan!</testcomponent>
</div>
<script src="index.js"></script>
</body>
</html>
Index.js文件:
Vue.component('testcomponent',{
template : '<h1><slot></slot></h1>',
});
var vm = new Vue({
el: '#component_test'
})
程序执行后,您将看到以下输出:
输出:
如何使用渲染函数?
假设您必须更改颜色和例如,输出结果的大小,我们在先前的示例中使用了h1标签,并且我们想更改
HTML标签到p标签或div标签或同一组件的任何其他标签。我们具有使用render函数进行更改的所有灵活性。渲染功能通过使其通用并帮助使用同一组件传递参数来帮助使组件动态化并使用所需的方式。
让我们看一个示例来演示渲染功能的使用:
Index.html文件:
<html>
<head>
<title>Vue.js Component</title>
<link rel="stylesheet" href="index.css">
<script src="https://cdn.jsdelivr.net/npm/vue/dist/vue.js"></script>
</head>
<body>
<div id = "component_test">
<testcomponent :elementtype = "'div,red,25,div1'">Hello Rahul!</testcomponent>
<testcomponent :elementtype = "'h2,brown,25,div1'">Hello James!</testcomponent>
<testcomponent :elementtype = "'p,blue,25,ptag'">Hello Alex!</testcomponent>
<testcomponent :elementtype = "'div,green,25,divtag'">Hello Priti!</testcomponent>
<testcomponent :elementtype = "'h4,blue,25,ptag'">Hello Mohan!</testcomponent>
</div>
<script src="index.js"></script>
</body>
</html>
Index.js文件:
Vue.component('testcomponent',{
render :function(createElement){
var a = this.elementtype.split(",");
return createElement(a[0],{
attrs:{
id:a[3],
style:"color:"+a[1]+";font-size:"+a[2]+";"
}
},
this.$slots.default
)
},
props:{
elementtype:{
attributes:String,
required:true
}
}
});
var vm = new Vue({
el: '#component_test'
})
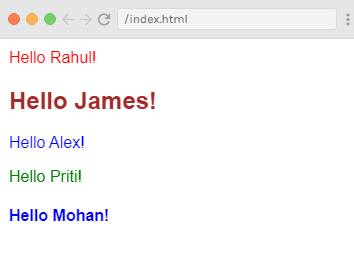
程序执行后,您将看到以下输出:
输出:
示例说明
在上面的示例中,您可以看到我们已经更改了组件,并在Index.js文件中使用以下代码添加了具有
props属性的
render函数:
Vue.component('testcomponent',{
render :function(createElement){
var a = this.elementtype.split(",");
return createElement(a[0],{
attrs:{
id:a[3],
style:"color:"+a[1]+";font-size:"+a[2]+";"
}
},
this.$slots.default
)
},
props:{
elementtype:{
attributes:String,
required:true
}
}
});
在这里,props属性看起来像下面的代码:
props:{
elementtype:{
attributes:String,
required:true
}
}
});
当我们使用带有渲染功能的组件时,它们没有模板标签或属性。代替它们,它们定义了一个名为render的函数,该函数接收以下结构的createElement:
语法:
(renderElement: String | Component, definition: Object, children: String | Array) argument
在以下示例中可以看到它:
render :function(createElement){
var a = this.elementtype.split(",");
return createElement(a[0],{
attrs:{
id:a[3],
style:"color:"+a[1]+";font-size:"+a[2]+";"
}
我们还定义了一个名为
elementtype 的属性,该属性采用字符串类型的属性字段。在另一个必填字段中,我们提到了该字段是必填字段。
请参阅渲染函数代码,其中我们已使用elementtype属性,如下所示:
render :function(createElement){
var a = this.elementtype.split(",");
return createElement(a[0],{
attrs:{
id:a[3],
style:"color:"+a[1]+";font-size:"+a[2]+";"
}
},
this.$slots.default
)
},
render函数将createElement作为参数并返回相同的值。 CreateElement的创建方式与
JavaScript 相同。我们还使用attrs字段中的值在逗号上拆分了元素类型。
CreateElement将第一个参数作为要创建的elementtag。它被传递给组件,如下所示:
<testcomponent :elementtype = "'div,red,25,div1'">Hello Rahul!</testcomponent>
该组件接受props字段作为上述代码。它以符号: 开头,然后指定道具名称。指定道具名称后,我们必须传递元素标签,颜色,字体大小和元素的ID。
在render函数中,您可以看到第一个元素是createElement字段中的elementtag赋予createElemet的方法如下:
return createElement(a[0],{
attrs:{
id:a[3],
style:"color:"+a[1]+";font-size:"+a[2]+";"
}
},
this.$slots.default
)
},
在上面的代码中,
a [0] 是html元素标记。接下来的参数是element标签的属性。它们在
attr 字段中定义如下:
attrs:{
id:a[3],
style:"color:"+a[1]+";font-size:"+a[2]+";"
}
},
在这里,我们为元素标签定义了两个属性: id标签和style标签。
在id标记中,我们传递了[3],这是在用逗号分割后的值。
在样式标签中,我们分别传递了a [1]和a [2]来定义颜色和字体大小。
我们在组件中给出的消息指定如下:
<testcomponent :elementtype = "'div,red,25,div1'">Hello Rahul!</testcomponent>
插槽字段用于使用以下代码定义我们要在createElement中打印的文本:
在程序执行后,看到输出,您将看到,所有输出条目均以特定方式显示。这是因为我们以特定方式定义了组件结构中的元素。
<div id = "component_test">
<testcomponent :elementtype = "'div,red,25,div1'">Hello Rahul!</testcomponent>
<testcomponent :elementtype = "'h2,brown,25,div1'">Hello James!</testcomponent>
<testcomponent :elementtype = "'p,blue,25,ptag'">Hello Alex!</testcomponent>
<testcomponent :elementtype = "'div,green,25,divtag'">Hello Priti!</testcomponent>
<testcomponent :elementtype = "'h4,blue,25,ptag'">Hello Mohan!</testcomponent>
</div>
Vue.js渲染函数中的事件绑定
让我们看一个示例来演示Vue.js渲染函数中的事件绑定。请参见以下示例:
示例
Index.html文件:
<html>
<head>
<title>Vue.js Event binding in render function</title>
<link rel="stylesheet" href="index.css">
<script src="https://cdn.jsdelivr.net/npm/vue/dist/vue.js"></script>
</head>
<body>
<div id="render_1"></div>
<script src="index.js"></script>
</body>
</html>
Index.js文件:
new Vue({
el: '#render_1',
data() {
return {
clickCount: 0,
}
},
methods: {
onClick() {
this.clickCount += 1;
}
},
render(createElement) {
const button = createElement('button', {
on: {
click: this.onClick
}
}, 'Click me');
const counter = createElement('span', [
'Number of clicks:',
this.clickCount
]);
return createElement('div', [
button, counter
])
}
});
程序执行后,您将看到以下输出:
输出:
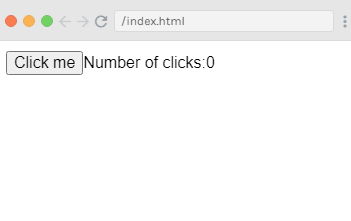
当您单击"单击我"按钮时,您将看到单击次数已显示为您的点击次数点击了按钮。参见输出:
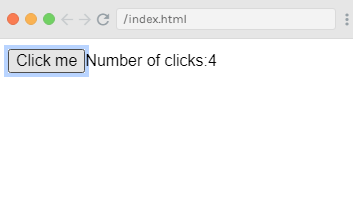
在上面的示例中,按钮被单击四次。

