Vue.js 路由
Vue.js没有内置的路由器功能,但是您可以轻松地创建一个单页应用程序,该应用程序使用推荐的正式格式支持-受支持的vue-router库。
要在Vue.js中安装路由器,必须执行一些步骤。您可以通过从CDN直接下载路由器或使用NPM或使用
Github来使用路由器。
直接从CDM下载
unpkg.com包含基于npm的CDN链接,并且始终更新为最新版本。下载unpkg.com文件后,将其托管到服务器,并与
Vue.js 作为脚本标签一起使用
<script src = "/path/to/vue.js"></script>
<script src = "/path/to/vue-router.js"></script>
如果要不下载就使用它,可以按以下方式使用它:
<script src="https://unpkg.com/vue-router/dist/vue-router.js"></script>
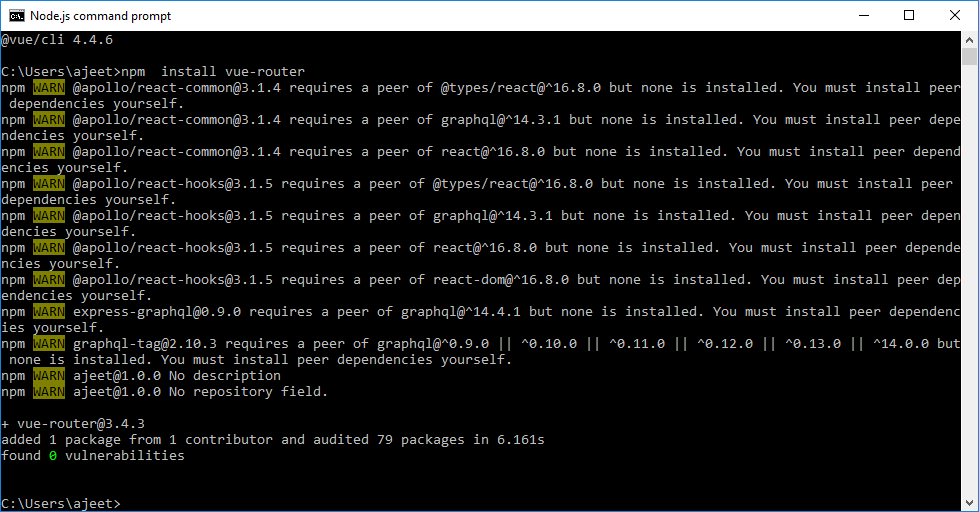
使用NPM安装路由器
打开Node.js命令提示符并运行以下命令来安装vue-router。
使用GitHub安装路由器
运行以下命令从GitHub克隆路由器存储库:
git clone https://github.com/vuejs/vue-router.git node_modules/vue-router
cd node_modules/vue-router
npm install
npm run build
让我们以一个简单的示例来了解Vue.js中路由的概念:
示例
Index.html文件:
<html>
<head>
<title>Vue.js Routing</title>
<link rel="stylesheet" href="index.css">
<script src="https://cdn.jsdelivr.net/npm/vue/dist/vue.js"></script>
<script src="https://unpkg.com/vue/dist/vue.js"></script>
<script src="https://unpkg.com/vue-router/dist/vue-router.js"></script>
</head>
<body>
<div id = "router_1">
<h2>This is Routing Example</h2>
<p>
<!-- use router-link component for navigation. -->
<!-- `<router-link>` will be rendered as an `<a>` tag by default -->
<router-link to = "/route1">Click on Router Link 1</router-link>
<router-link to = "/route2"> Click on Router Link 2</router-link>
</p>
<!-- route outlet -->
<!-- component matched by the route will render here -->
<router-view></router-view>
</div>
<script type = "text/javascript">
const Route1 = { template: '<div style = "border-radius:30px;background-color:lightpink;width:300px;height:100px;margin:10px;font-size:25px;padding:10px;">You are seeing router link 1</div>' }
const Route2 = { template: '<div style = "border-radius:20px;background-color:lightgreen;width:300px;height:100px;margin:10px;font-size:25px;padding:10px;"> You are seeing router link 2</div>' }
const routes = [
{ path: '/route1', component: Route1 },
{ path: '/route2', component: Route2 }
];
const router = new VueRouter({
routes // short for `routes: routes`
});
</script>
<script src="index.js"></script>
</body>
</html>
Index.js文件:
var vm = new Vue({
el: '#router_1',
router
})
让我们使用一个简单的CSS文件来使输出更具吸引力。
Index.css文件:
html, body {
margin: 5px;
padding: 0;
}
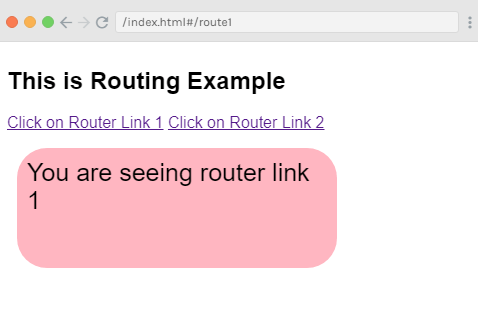
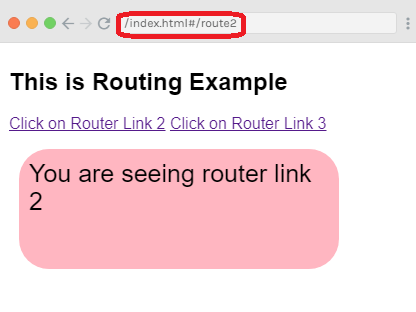
程序执行后,您将看到以下输出:
输出:
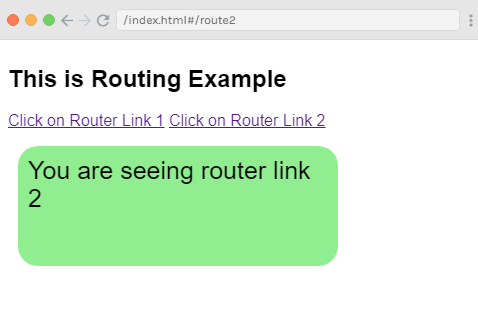
单击路由器链接2,您将看到它被重定向到以下结果。
示例说明
在上面的示例中,您可以看到我们如下添加了vue-router.js文件:
<script src="https://unpkg.com/vue/dist/vue.js"></script>
<script src="https://unpkg.com/vue-router/dist/vue-router.js"></script>4
在下面的代码中,我们创建了两个路由器链接。我们在主体部分中定义了以下路由器链接:
<router-link to = "/route1">Click on Router Link 1</router-link>
<router-link to = "/route2"> Click on Router Link 2</router-link>
在这里,
是用于导航到HTML内容并将其显示给用户的组件。
至属性指定目的地。例如,您必须单击显示链接的文件。
路由器在脚本部分中初始化,其中创建了两个常量,如下所示:
const Route1 = { template: '<div style = "border-radius:30px;background-color:lightpink;width:300px;height:100px;margin:10px;font-size:25px;padding:10px;">You are seeing router link 1</div>' }
const Route2 = { template: '<div style = "border-radius:20px;background-color:lightgreen;width:300px;height:100px;margin:10px;font-size:25px;padding:10px;"> You are seeing router link 2</div>' }
在上面的代码中,我们指定了单击路由器链接时将显示的模板。
接下来是路线const,其中我们定义了必须在其中显示的路径网址。
const routes = [
{ path: '/route1', component: Route1 },
{ path: '/route2', component: Route2 }
];
路由用于定义路径和组件。用户单击路由器链接时,路径将显示在输出中。
该组件采用要显示的模板的名称。路由的路径需要与到属性的路由器链接相匹配。
例如,
<router-link to = "name_of_-the_path"></router-link>
现在,我们使用以下代码创建了VueRouter实例:
const router = new VueRouter({
routes // short for `routes: routes`
});
VueRouter构造函数将路由作为参数。我们已经使用以下代码将路由器对象分配给主Vue实例。
var vm = new Vue({
el: '#router_1',
router
})
执行上面的示例后,您将在浏览器中看到输出。如果您可以检查和检查路由器链接,我们将发现它为活动元素添加了类。添加的类为class ="router-link-exact-active router-link-active"。
将属性传递到路由器链接
让我们看看如何传递路由器链接的属性。在上面的示例中,我们已将属性" to"传递给路由器链接,如下所示:
<router-link to = "/route1">Click on Router Link 1</router-link>
<router-link to = "/route2"> Click on Router Link 2</router-link>
此属性可以通过许多其他方式传递到路由器链接。
to属性
它用于指定指定给<router-link>。当您单击链接时,它将在内部将值传递给
router.push()。该值必须是字符串或位置对象。使用"
至" 属性可以通过三种方式传递值。
示例1:
<router-link to = "/route1">Click on Router Link 1</router-link>
It is rendered as:
<a href = "#/route">Router Link </a>
示例2:
<router-link v-bind:to = "{path:'/route1'}">Click on Router Link 2</router-link> // When using an object, it is recommended to bind it as shown in e.g. 2.
示例3:
<router-link v-bind:to = "{path:'/route1', query: { name: 'Alex' }}">Click on Router Link 3</router-link>//You can pass a query string as shown in e.g. 3. This is an example of router link with query string.
在上面的示例中,我们使用了示例1的方法。在下面的示例中,让我们看第二种方法和第三种方法。
Index.html文件:
<html>
<head>
<title>Vue.js Routing</title>
<link rel="stylesheet" href="index.css">
<script src="https://cdn.jsdelivr.net/npm/vue/dist/vue.js"></script>
<script src="https://unpkg.com/vue/dist/vue.js"></script>
<script src="https://unpkg.com/vue-router/dist/vue-router.js"></script>
</head>
<body>
<div id = "router_1">
<h2>This is Routing Example</h2>
<p>
<!-- use router-link component for navigation. -->
<!-- `<router-link>` will be rendered as an `<a>` tag by default -->
<router-link v-bind:to = "{path:'/route2'}">Click on Router Link 2</router-link>
<router-link v-bind:to = "{path:'/route3', query: { name: 'Alex' }}">Click on Router Link 3</router-link>
</p>
<!-- route outlet -->
<!-- component matched by the route will render here -->
<router-view></router-view>
</div>
<script type = "text/javascript">
const Route2 = { template: '<div style = "border-radius:30px;background-color:lightpink;width:300px;height:100px;margin:10px;font-size:25px;padding:10px;">You are seeing router link 2</div>' }
const Route3 = { template: '<div style = "border-radius:20px;background-color:lightgreen;width:300px;height:100px;margin:10px;font-size:25px;padding:10px;"> You are seeing router link 3</div>' }
const routes = [
{ path: '/route2', component: Route2 },
{ path: '/route3', component: Route3 }
];
const router = new VueRouter({
routes // short for `routes: routes`
});
</script>
<script src="index.js"></script>
</body>
</html>
Index.js文件:
var vm = new Vue({
el: '#router_1',
router
})
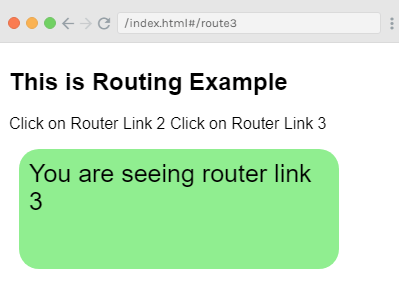
程序执行后,您将看到以下输出:
输出:
现在,单击路由器链接3,您将在URL中看到设置名称作为查询字符串。参见输出:

replace属性
replace属性用于替换路由器链接并调用router.replace()而不是router.push()。如果您使用replace prop,则不会存储导航历史记录。
Index.html文件:
<html>
<head>
<title>Vue.js Routing</title>
<link rel="stylesheet" href="index.css">
<script src="https://cdn.jsdelivr.net/npm/vue/dist/vue.js"></script>
<script src="https://unpkg.com/vue/dist/vue.js"></script>
<script src="https://unpkg.com/vue-router/dist/vue-router.js"></script>
</head>
<body>
<div id = "router_1">
<h2>This is Routing Example</h2>
<p>
<!-- use router-link component for navigation. -->
<!-- `<router-link>` will be rendered as an `<a>` tag by default -->
<router-link v-bind:to = "{path:'/route2'}">Click on Router Link 2</router-link>
<router-link v-bind:to = "{path:'/route3', query: { name: 'Panda' }}" replace>This link is Replaced</router-link>
</p>
<!-- route outlet -->
<!-- component matched by the route will render here -->
<router-view></router-view>
</div>
<script type = "text/javascript">
const Route2 = { template: '<div style = "border-radius:30px;background-color:lightpink;width:300px;height:100px;margin:10px;font-size:25px;padding:10px;">You are seeing router link 2</div>' }
const Route3 = { template: '<div style = "border-radius:20px;background-color:lightgreen;width:300px;height:100px;margin:10px;font-size:25px;padding:10px;"> You are seeing router link 3</div>' }
const routes = [
{ path: '/route2', component: Route2 },
{ path: '/route3', component: Route3 }
];
const router = new VueRouter({
routes // short for `routes: routes`
});
</script>
<script src="index.js"></script>
</body>
</html>
Index.js文件将是相同的。
程序执行后,您将看到以下输出:
输出:
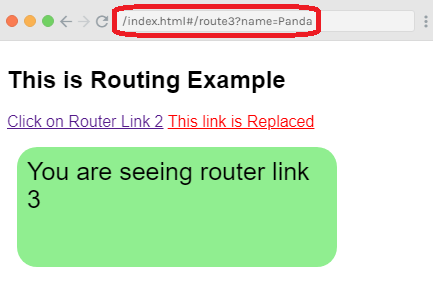
单击即可看到
append属性
附加标签用于与
添加到使路径相对。让我们举个例子。
示例:
Index.html文件:
<html>
<head>
<title>Vue.js Routing</title>
<link rel="stylesheet" href="index.css">
<script src="https://cdn.jsdelivr.net/npm/vue/dist/vue.js"></script>
<script src="https://unpkg.com/vue/dist/vue.js"></script>
<script src="https://unpkg.com/vue-router/dist/vue-router.js"></script>
</head>
<body>
<div id = "router_1">
<h2>This is Routing Example</h2>
<p>
<!-- use router-link component for navigation. -->
<!-- `<router-link>` will be rendered as an `<a>` tag by default -->
<router-link v-bind:to = "{path:'/route2'}">Click on Router Link 2</router-link>
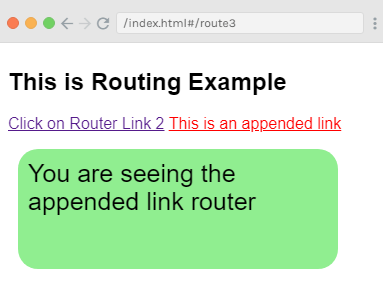
<router-link v-bind:to = "{ path: '/route3'}" append>This is an appended link</router-link>
</p>
<!-- route outlet -->
<!-- component matched by the route will render here -->
<router-view></router-view>
</div>
<script type = "text/javascript">
const Route2 = { template: '<div style = "border-radius:30px;background-color:lightpink;width:300px;height:100px;margin:10px;font-size:25px;padding:10px;">You are seeing router link 2</div>' }
const Route3 = { template: '<div style = "border-radius:20px;background-color:lightgreen;width:300px;height:100px;margin:10px;font-size:25px;padding:10px;"> You are seeing the appended link router</div>' }
const routes = [
{ path: '/route2', component: Route2 },
{ path: '/route3', component: Route3 }
];
const router = new VueRouter({
routes // short for `routes: routes`
});
</script>
<script src="index.js"></script>
</body>
</html>
Index.js文件:
var vm = new Vue({
el: '#router_1',
router
})
让我们使用一个简单的CSS文件来使输出更具吸引力。
Index.css文件:
html, body {
margin: 5px;
padding: 0;
}
程序执行后,您将看到以下输出:
输出:
tag属性
呈现为标记。当您要将其呈现为其他标签时,可以使用标签prop。例如,如果要将<router-link>呈现为"span",则应将其指定为
tag ="span"。让我们举一个简单的例子。
示例:
Index.html文件:
<html>
<head>
<title>Vue.js Routing</title>
<link rel="stylesheet" href="index.css">
<script src="https://cdn.jsdelivr.net/npm/vue/dist/vue.js"></script>
<script src="https://unpkg.com/vue/dist/vue.js"></script>
<script src="https://unpkg.com/vue-router/dist/vue-router.js"></script>
</head>
<body>
<div id = "router_1">
<h2>This is Routing Example</h2>
<p>
<router-link v-bind:to = "{ path: '/route2'}" tag = "span">Click on Router Link 2</router-link>
<router-link v-bind:to = "{ path: '/route3'}" tag = "span">Click on Router Link 3</router-link>
</p>
<!-- route outlet -->
<!-- component matched by the route will render here -->
<router-view></router-view>
</div>
<script type = "text/javascript">
const Route2 = { template: '<div style = "border-radius:30px;background-color:lightpink;width:300px;height:100px;margin:10px;font-size:25px;padding:10px;">You are seeing router link 2</div>' }
const Route3 = { template: '<div style = "border-radius:20px;background-color:lightgreen;width:300px;height:100px;margin:10px;font-size:25px;padding:10px;"> You are seeing router link 3</div>' }
const routes = [
{ path: '/route2', component: Route2 },
{ path: '/route3', component: Route3 }
];
const router = new VueRouter({
routes // short for `routes: routes`
});
</script>
<script src="index.js"></script>
</body>
</html>
Index.js文件:
index.js文件与前面示例中使用的文件相同。
执行完程序,您将看到以下输出:
输出:
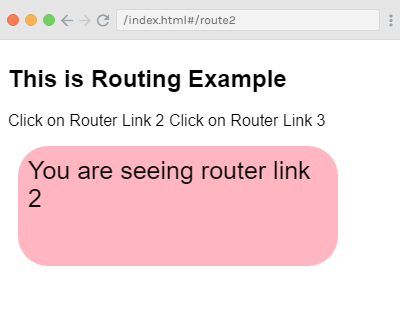
在上面的示例中,您可以看到现在显示的标记是span标签。它们不被视为可单击的链接,但是您可以单击它们。现在,单击路由器链接3并查看结果。
active-class属性
要将活动类属性激活,它会添加到
。它用于表明路由器链接处于活动状态。它被添加为
active-class ="_active"。
以下代码指定示例中的使用方法。
语法:
<style>
._active{
background-color : red;
}
</style>
<p>
<router-link v-bind:to = "{ path: '/route2'}" active-class = "._active">Click on Router Link 2</router-link>
<router-link v-bind:to = "{ path: '/route3'}" tag = "span">Click on Router Link 3</router-link>
</p>
这将使"单击路由器链接2"路径处于活动状态,而"单击路由器链接3"将保持相同。
exact-active-class属性
exact-active-class配置当链接完全匹配且处于活动状态时应用的活动CSS类。默认的精确活动类被应用为router-link-exact-active。
以下代码指定示例中的使用方法。
语法:
<style>
._active{
background-color : red;
}
</style>
<p>
<router-link v-bind:to = "{ path: '/route2'}" exact-active-class = "._active">Click on Router Link 2</router-link>
<router-link v-bind:to = "{ path: '/route3'}" tag = "span">Click on Router Link 3</router-link>
</p>
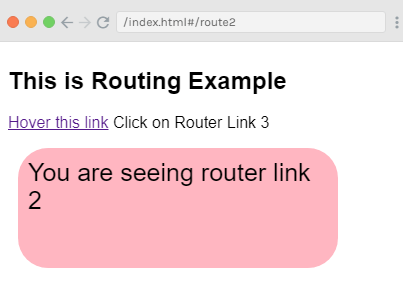
event属性
在上一个示例中,您已经看到router-link的默认事件是click事件。当您单击链接时,将显示路由器链接。您可以使用event属性来更改此设置。请参见以下示例:
示例:
Index.html文件:
<html>
<head>
<title>Vue.js Routing</title>
<link rel="stylesheet" href="index.css">
<script src="https://cdn.jsdelivr.net/npm/vue/dist/vue.js"></script>
<script src="https://unpkg.com/vue/dist/vue.js"></script>
<script src="https://unpkg.com/vue-router/dist/vue-router.js"></script>
</head>
<body>
<div id = "router_1">
<h2>This is Routing Example</h2>
<style>
._active{
background-color : red;
}
</style>
<p>
<router-link v-bind:to = "{ path: '/route2'}" event = "mouseover">Hover this link</router-link>
<router-link v-bind:to = "{ path: '/route3'}" tag = "span">Click on Router Link 3</router-link>
</p>
<!-- route outlet -->
<!-- component matched by the route will render here -->
<router-view></router-view>
</div>
<script type = "text/javascript">
const Route2 = { template: '<div style = "border-radius:30px;background-color:lightpink;width:300px;height:100px;margin:10px;font-size:25px;padding:10px;">You are seeing router link 2</div>' }
const Route3 = { template: '<div style = "border-radius:20px;background-color:lightgreen;width:300px;height:100px;margin:10px;font-size:25px;padding:10px;"> You are seeing router link 3</div>' }
const routes = [
{ path: '/route2', component: Route2 },
{ path: '/route3', component: Route3 }
];
const router = new VueRouter({
routes // short for `routes: routes`
});
</script>
<script src="index.js"></script>
</body>
</html>
Index.js文件:
Index.js文件与上面的示例相同。
程序执行后,您将将看到以下输出:
输出:
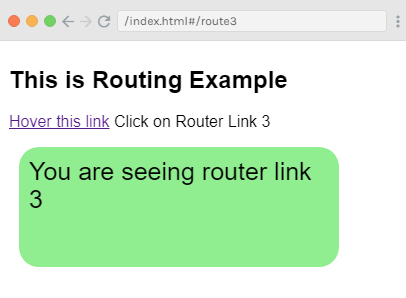
当您将鼠标光标悬停在第一个链接上时,您将看到以下结果。