Electron 通知
Electron 仅为 MacOS 提供原生通知 API。所以我们不会使用它,而是使用一个名为
node-notifier 的 npm 模块。它允许我们通知 Windows、MacOS 和 Linux 上的用户。
使用该文件夹中的以下命令在您的应用程序文件夹中安装 node-notifier 模块-
$ npm install--save node-notifier
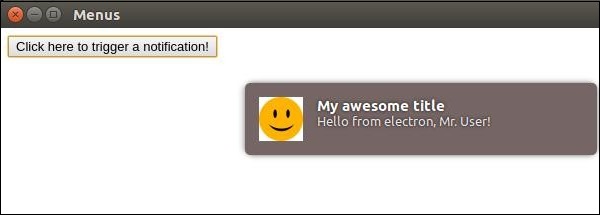
现在让我们创建一个应用,它有一个按钮,每次我们点击这个按钮时都会生成一个通知。
创建一个新的
main.js 文件并在其中输入以下代码-
const {app, BrowserWindow} = require('electron')
const url = require('url')
const path = require('path')
let win
function createWindow() {
   win = new BrowserWindow({width: 800, height: 600})
   win.loadURL(url.format ({
      pathname: path.join(__dirname, 'index.html'),
      protocol: 'file:',
      slashes: true
   }))
}
app.on('ready', createWindow)
现在让我们创建将触发通知的网页和脚本。使用以下代码创建一个新的
index.html 文件-
<!DOCTYPE html>
<html>
   <head>
      <meta charset = "UTF-8">
      <title>Menus</title>
   </head>

   <body>
      <button type = "button" id = "notify" name = "button">
         Click here to trigger a notification!</button>
      <script type = "text/javascript">
         const notifier = require('node-notifier')
         const path = require('path');

         document.getElementById('notify').onclick = (event) => {
            notifier.notify ({
               title: 'My awesome title',
               message: 'Hello from electron, Mr. User!',
               icon: path.join('','/home/ayushgp/Desktop/images.png'),  // Absolute path
                  (doesn't work on balloons)
               sound: true,  // Only Notification Center or Windows Toasters
               wait: true    // Wait with callback, until user action is taken
               against notification

            }, function (err, response) {
               // Response is response from notification
            });
            notifier.on('click', function (notifierObject, options) {
               console.log("You clicked on the notification")
            });
            notifier.on('timeout', function (notifierObject, options) {
               console.log("Notification timed out!")
            });
         }
      </script>
   </body>
</html>
notify 方法允许我们向它传递一个
objectwith 信息,如标题、消息、缩略图等,这有助于我们自定义通知。我们还可以在通知上设置一些事件监听器。
现在,使用以下命令运行应用程序-
当您单击我们创建的按钮时,您将看到来自操作系统的本机通知,如下面的屏幕截图所示-
我们还处理了用户点击通知或通知超时的事件。如果应用在后台运行,这些方法有助于我们使应用更具交互性。

