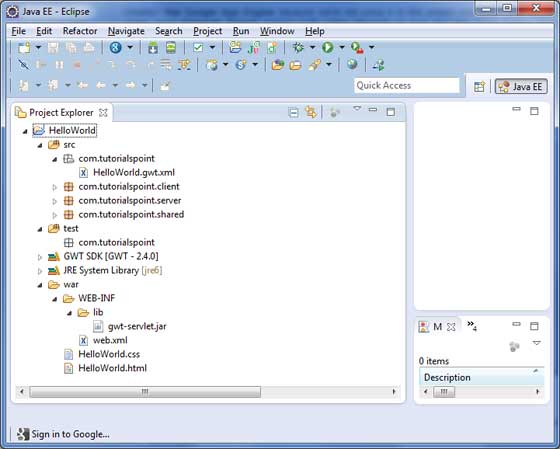
| 文件夹和位置 | |
| 1 |
src
源代码(java 类)文件。
客户端文件夹,包含负责客户端 UI 的客户端特定 java 类
Server 文件夹包含负责服务器端处理的服务器端 java 类。
共享文件夹包含 java 模型类,用于将数据从服务器传输到客户端,反之亦然。
HelloWorld.gwt.xml,GWT编译器编译HelloWorld项目所需的模块描述符文件。
|
| 2 |
test
测试代码(java 类)源文件。
包含负责测试 gwt 客户端代码的 java 类的客户端文件夹.
|
| 3 |
war
这是最重要的部分,它代表了实际可部署的 Web 应用程序。
WEB-INF 包含已编译的类, gwt 库,servlet 库。
HelloWorld.css,项目样式表。
HelloWorld.html,将调用 GWT UI 应用程序的热门 HTML。
|
<?xml version = "1.0" encoding = "UTF-8"?>
<module rename-to = 'helloworld'>
   <!--Inherit the core Web Toolkit stuff.                       -->
   <inherits name = 'com.google.gwt.user.User'/>
   <!--Inherit the default GWT style sheet.  You can change      -->
   <!--the theme of your GWT application by uncommenting         -->
   <!--any one of the following lines.                           -->
   <inherits name = 'com.google.gwt.user.theme.clean.Clean'/>
   <!--<inherits name = 'com.google.gwt.user.theme.chrome.Chrome'/>-->
   <!--<inherits name = 'com.google.gwt.user.theme.dark.Dark'/>    -->
   <!--Other module inherits                                     -->
   <!--Specify the app entry point class.                        -->
   <entry-point class = 'com.tutorialspoint.client.HelloWorld'/>
   <!--Specify the paths for translatable code                   -->
   <source path = 'client'/>
   <source path = 'shared'/>
</module>
body {
   text-align: center;
   font-family: verdana, sans-serif;
}
h1 {
   font-size: 2em;
   font-weight: bold;
   color: #777777;
   margin: 40px 0px 70px;
   text-align: center;
}
<html>
   <head>
      <title>Hello World</title>
      <link rel = "stylesheet" href = "HelloWorld.css"/>
      <script language = "javascript" src = "helloworld/helloworld.nocache.js">
      </script>
   </head>
   <body>
      <h1>Hello World</h1>
      <p>Welcome to first GWT application</p>
   </body>
</html>
package com.tutorialspoint.client;
import com.google.gwt.core.client.EntryPoint;
import com.google.gwt.user.client.Window;
public class HelloWorld implements EntryPoint {
   public void onModuleLoad() {
      Window.alert("Hello, World!");
   }
}
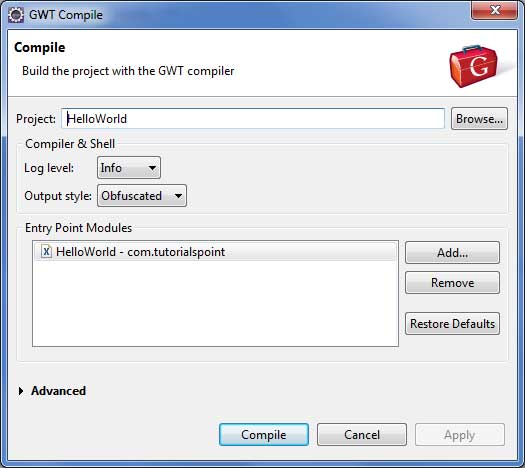
Compiling module com.tutorialspoint.HelloWorld
   Compiling 6 permutations
      Compiling permutation 0...
      Compiling permutation 1...
      Compiling permutation 2...
      Compiling permutation 3...
      Compiling permutation 4...
      Compiling permutation 5...
   Compile of permutations succeeded
Linking into C:\workspace\HelloWorld\war\helloworld
   Link succeeded
   Compilation succeeded--33.029s


