GWT 部署应用程序
本教程将向您解释如何创建应用程序
"war" 文件以及如何在 Apache Tomcat Websever 根目录中部署该文件。
如果您理解了这个简单的示例,那么您也将能够按照相同的步骤部署复杂的 GWT 应用程序。
让我们使用 Eclipse IDE 和 GWT 插件,然后按照以下步骤创建 GWT 应用程序-
| 步骤 |
| 在com.tutorialspoint 包下创建一个名为HelloWorld 的项目,如GWT-创建应用程序 章节所述。 |
| 将HelloWorld.gwt.xml、HelloWorld.css、HelloWorld.html和HelloWorld.java修改为下面解释。保持其余文件不变。 |
| 编译并运行应用程序以确保业务逻辑按照要求工作。 |
| 最后将应用程序war文件夹的内容以war文件的形式压缩,部署到Apache Tomcat Webserver中。 |
| 使用适当的 URL 启动您的 Web 应用程序,如下面最后一步所述。 |
以下是修改后的模块描述符
src/com.tutorialspoint/HelloWorld.gwt.xml的内容。
<?xml version = "1.0" encoding = "UTF-8"?>
<module rename-to = 'helloworld'>
   <!--Inherit the core Web Toolkit stuff.                       -->
   <inherits name = 'com.google.gwt.user.User'/>
   <!--Inherit the default GWT style sheet.                      -->
   <inherits name = 'com.google.gwt.user.theme.clean.Clean'/>
   <!--Specify the app entry point class.                        -->
   <entry-point class = 'com.tutorialspoint.client.HelloWorld'/>
   <!--Specify the paths for translatable code                   -->
   <source path = 'client'/>
   <source path = 'shared'/>
</module>
以下是修改后的样式表文件
war/HelloWorld.css的内容。
body {
   text-align: center;
   font-family: verdana, sans-serif;
}
h1 {
   font-size: 2em;
   font-weight: bold;
   color: #777777;
   margin: 40px 0px 70px;
   text-align: center;
}
以下是修改后的HTML主机文件
war/HelloWorld.html的内容。
<html>
   <head>
      <title>Hello World</title>
      <link rel = "stylesheet" href = "HelloWorld.css"/>
      <script language = "javascript" src = "helloworld/helloworld.nocache.js">
      </script>
   </head>
   <body>
      <h1>Hello World</h1>
      <div id = "gwtContainer"></div>
   </body>
</html>
我从前面的示例中稍微修改了 HTML。在这里,我创建了一个占位符
...
,我们将在其中使用我们的入口点 java 类插入一些内容。所以让我们有Java文件
src/com.tutorialspoint/HelloWorld.java的以下内容。
package com.tutorialspoint.client;
import com.google.gwt.core.client.EntryPoint;
import com.google.gwt.user.client.ui.HTML;
import com.google.gwt.user.client.ui.RootPanel;
public class HelloWorld implements EntryPoint {
   public void onModuleLoad() {
      HTML html = new HTML("<p>Welcome to GWT application</p>");

      RootPanel.get("gwtContainer").add(html);
   }
}
这里我们创建了基本的 widest HTML,并将其添加到 id="gwtContainer" 的 div 标签中。我们将在接下来的章节中研究不同的 GWT 小部件。
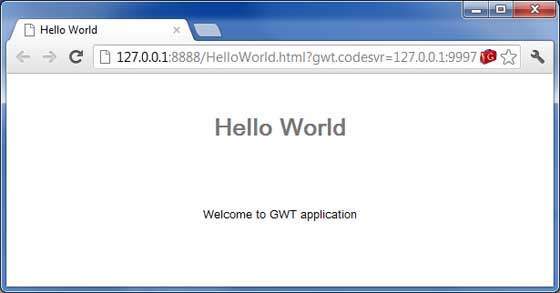
一旦您准备好完成所有更改,让我们像在GWT-创建应用程序一章中所做的那样,在开发模式下编译和运行应用程序。如果您的应用程序一切正常,这将产生以下结果-

创建 WAR 文件
现在我们的应用程序运行良好,我们准备将其导出为 war 文件。
按照以下步骤操作-
进入项目的 war 目录 C:\workspace\HelloWorld\war
选择 war 目录中所有可用的文件和文件夹。
将所有选定的文件和文件夹压缩到一个名为 HelloWorld.zip 的文件中。
将 HelloWorld.zip 重命名为 HelloWorld.war。
部署WAR文件
停止 tomcat 服务器。
将 HelloWorld.war 文件复制到 tomcat 安装目录 > webapps 文件夹。
启动 tomcat 服务器。
查看webapps目录,应该有一个helloworld文件夹被创建。
现在 HelloWorld.war 已成功部署在 Tomcat Webserver 根目录中。
运行应用程序
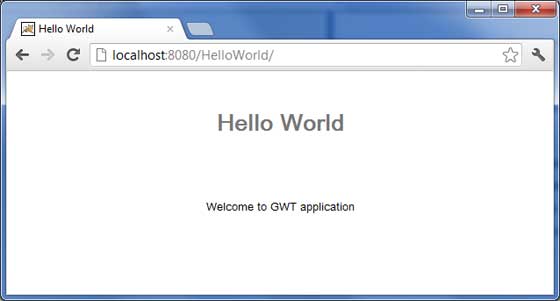
在 Web 浏览器中输入 url:
http://localhost:8080/HelloWorld 以启动应用程序
服务器名称 (localhost) 和端口 (8080) 可能因您的 tomcat 配置而异。


